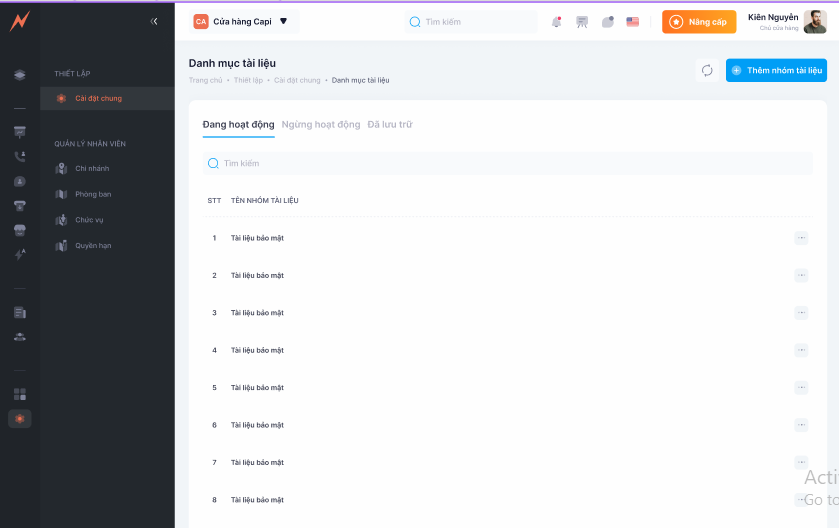
# Danh mục tài liệu
To set up the document catalog, in the Nobi Pro admin page, go to **Setup -> General Settings -> Document Category**. The interface will be displayed as shown below:
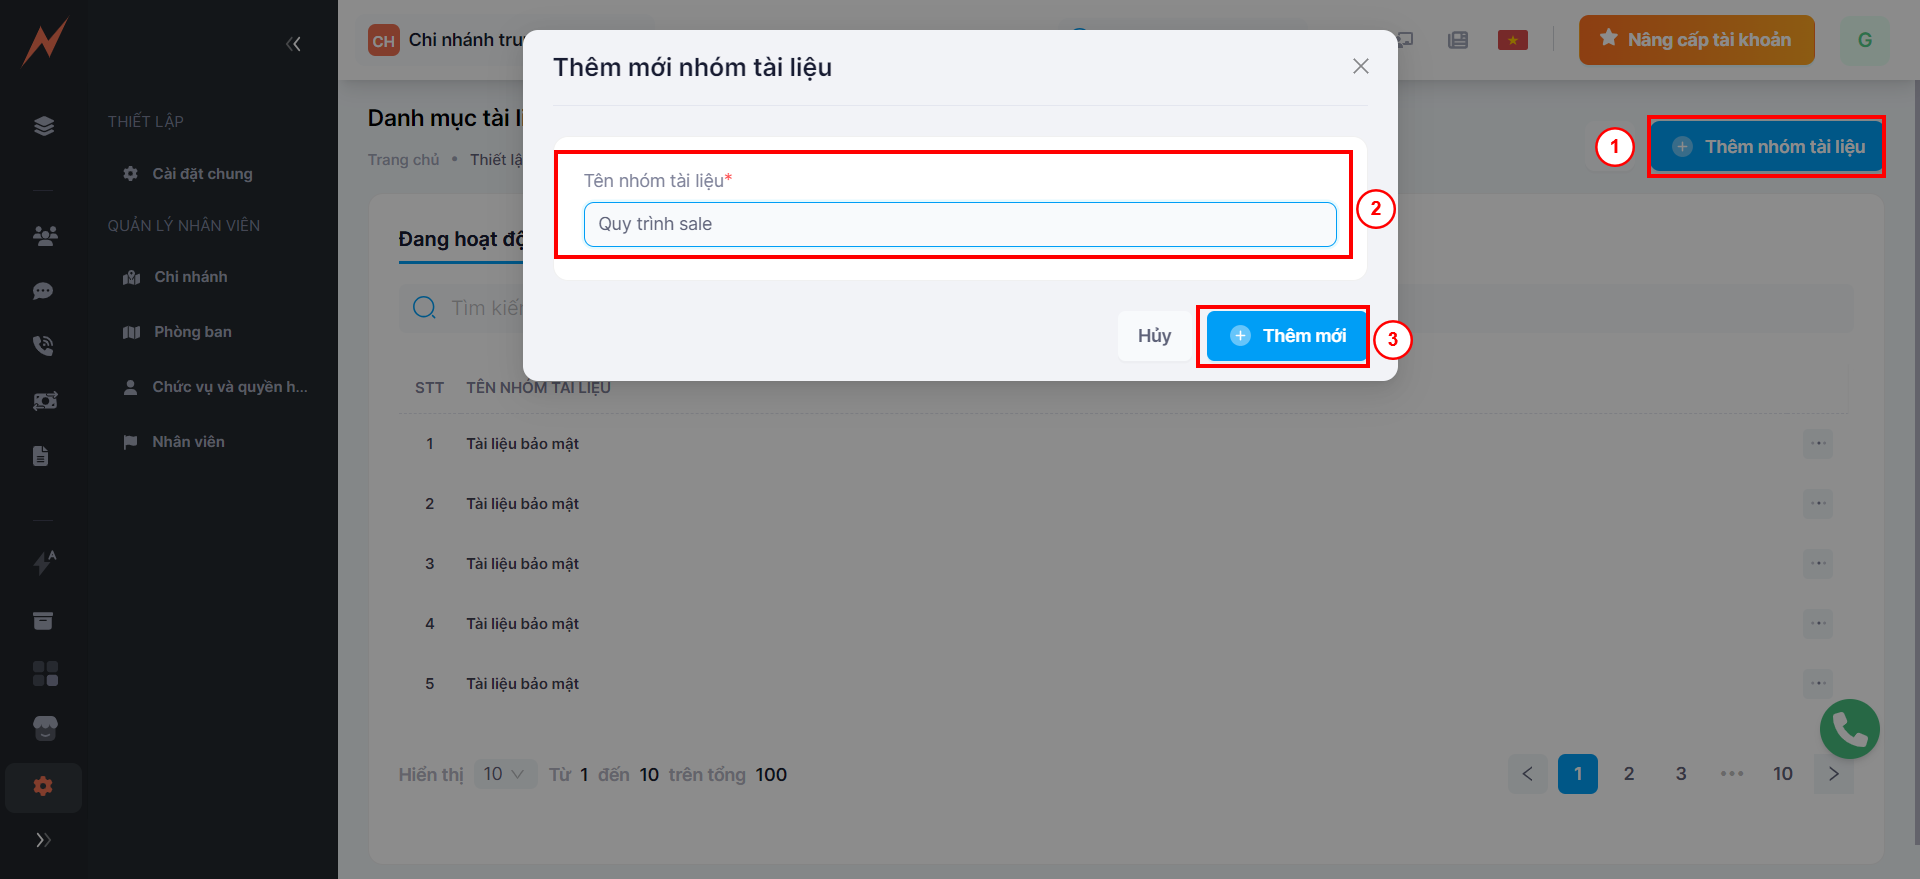
## 1. Add new document category
To add a new document category, please follow these steps:
Step 1: Click "Add document group" -> Create document group
Step 2: Enter the name of the document group
Stepp 3: Click "Add"
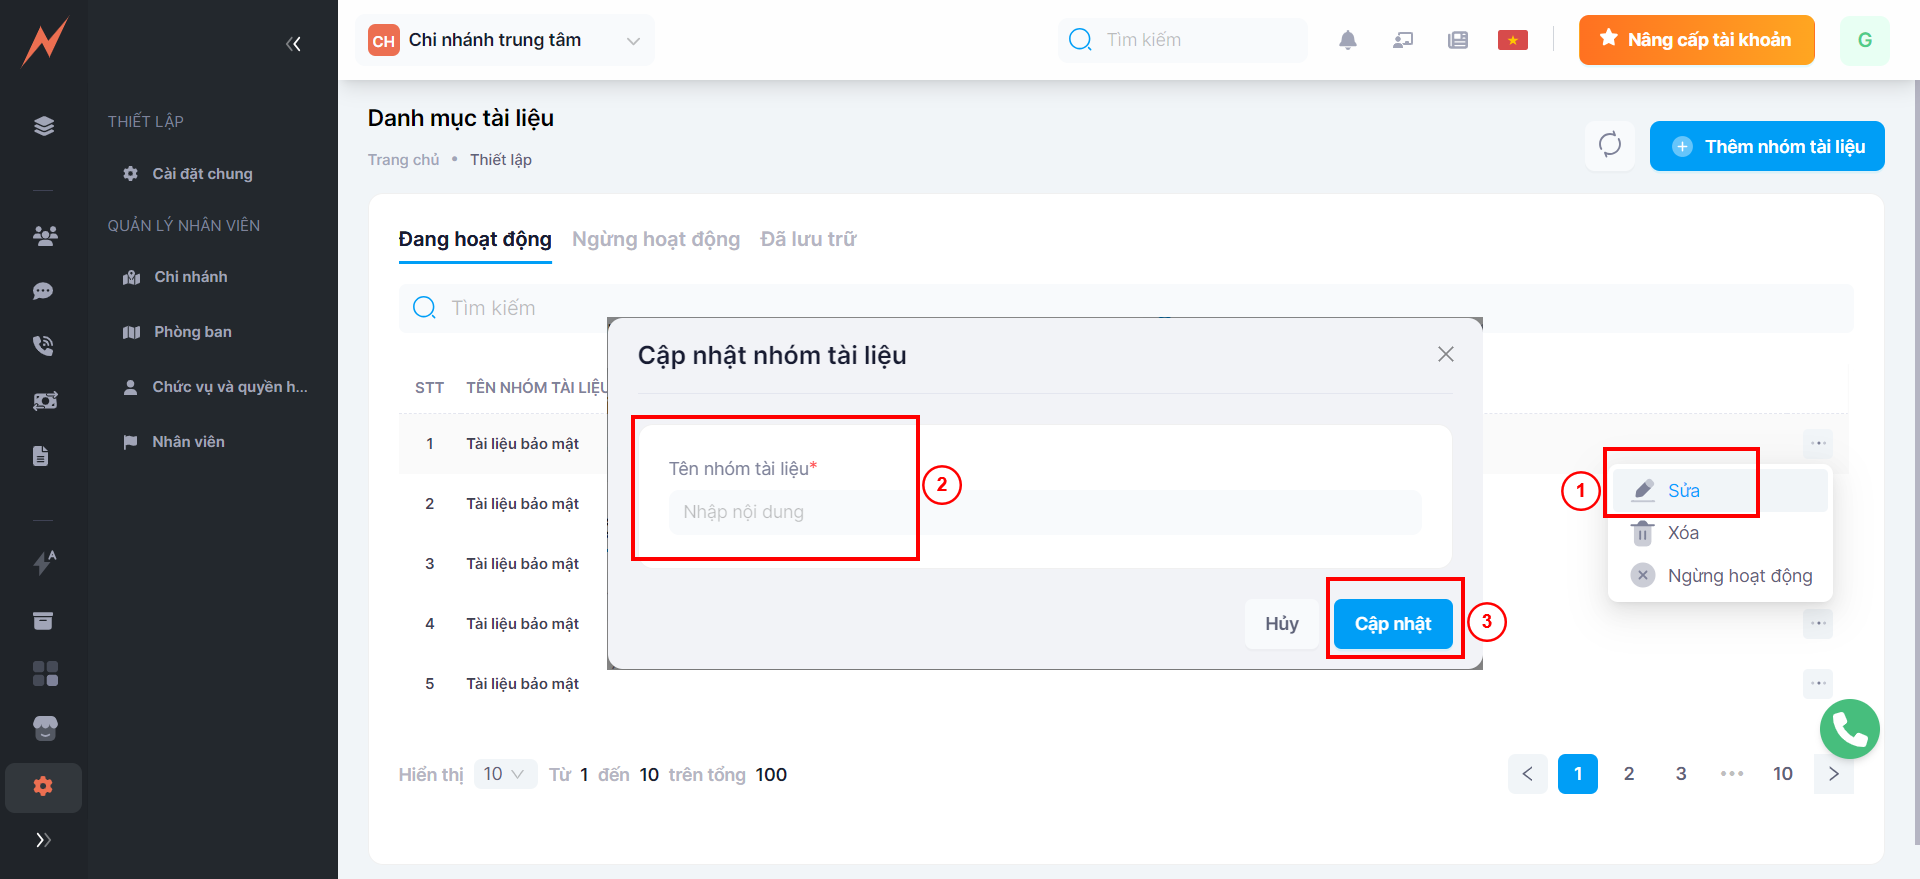
## 2. Update document catalog
To update the document catalog, please follow these steps:
Step 1: Click the three dots on the right side of the document category
Step 2: Click "Edit" -> The update form displays
Step 3: Enter the information to be updated
Step 4: Click "Update"
## 3. Delete document category
To delete a document category, please follow these steps:
Step 1: Click the three dots on the right side of the document category
Step 2: Click "Delete"
Step 3: Click "Yes"
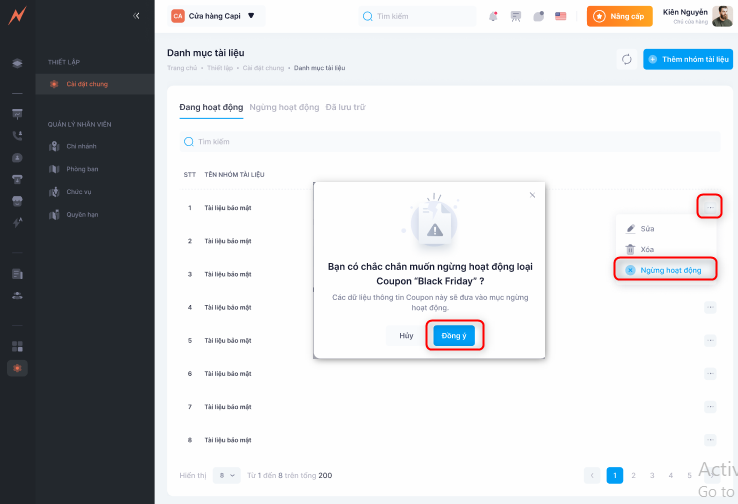
### 4. Change the operational status of the document category
To support the discontinuation of using certain document categories without actually deleting them, Nobi allows you to change the configuration of the usage status of these document categories.
#### 4.1 Inactivate the document directory
To inactive the document category, please follow these steps:
Step 1: Click the three dots on the right side of the document category
Step 2: Click "Inactive"
Step 3: Click "Agree"
#### 4.2 Restore document directory
Document categories that have been deactivated will be displayed in the **Inactive** tab. To reactivate a document category, please follow these steps:
Step 1: Click the three dots on the right side of the document category
Step 2: Click "Restore"
Step 3: Click "Agree"
### 5. **Archived**
Once "Document Categories" are deleted, they will be archived and managed in the **Archived** tab after successful deletion. Users can restore the document categories or permanently delete them from the system.
#### 5.1 Restore document directory
To restore the document directory, please follow these steps:
Step 1: Click the three dots on the right side of the document category
Step 2: Click "Restore"
Step 3: In the delete confirmation popup, click "Restore"
#### 5.2 Delete permanently
To permanently delete a document category, please follow these steps:
Step 1: Click the three dots on the right side of the document category
Step 2: Click "Delete"
Step 3: In the delete confirmation popup, click "Delete"