
Facebook conversation
1. Send/Receive Messages
Sending/receiving messages is an important feature of Nobi Chat. After the fanpage is connected to the Nobi.Pro software, and linked to Nobi Chat, when customers send messages or comment on posts, the conversation will automatically appear on the Nobi Pro system. Additionally, you can also synchronize old conversations into the system.
For customers who interact with the page within 7 days: Users on the Nobi software can send messages to customers without needing admin/editor rights on the Fanpage. However, they are only allowed to send individual messages or single images, single files. It is not permitted to send template messages with multiple contents/multiple images/multiple files.
For customers who have interacted with the page beyond 7 days: To message the customer, the user needs to install the Nobi Pro extension on their browser. Instructions for installing the extension: HERE
2. Conversation Filtering
(1) Search: Search for customers by name or by content.
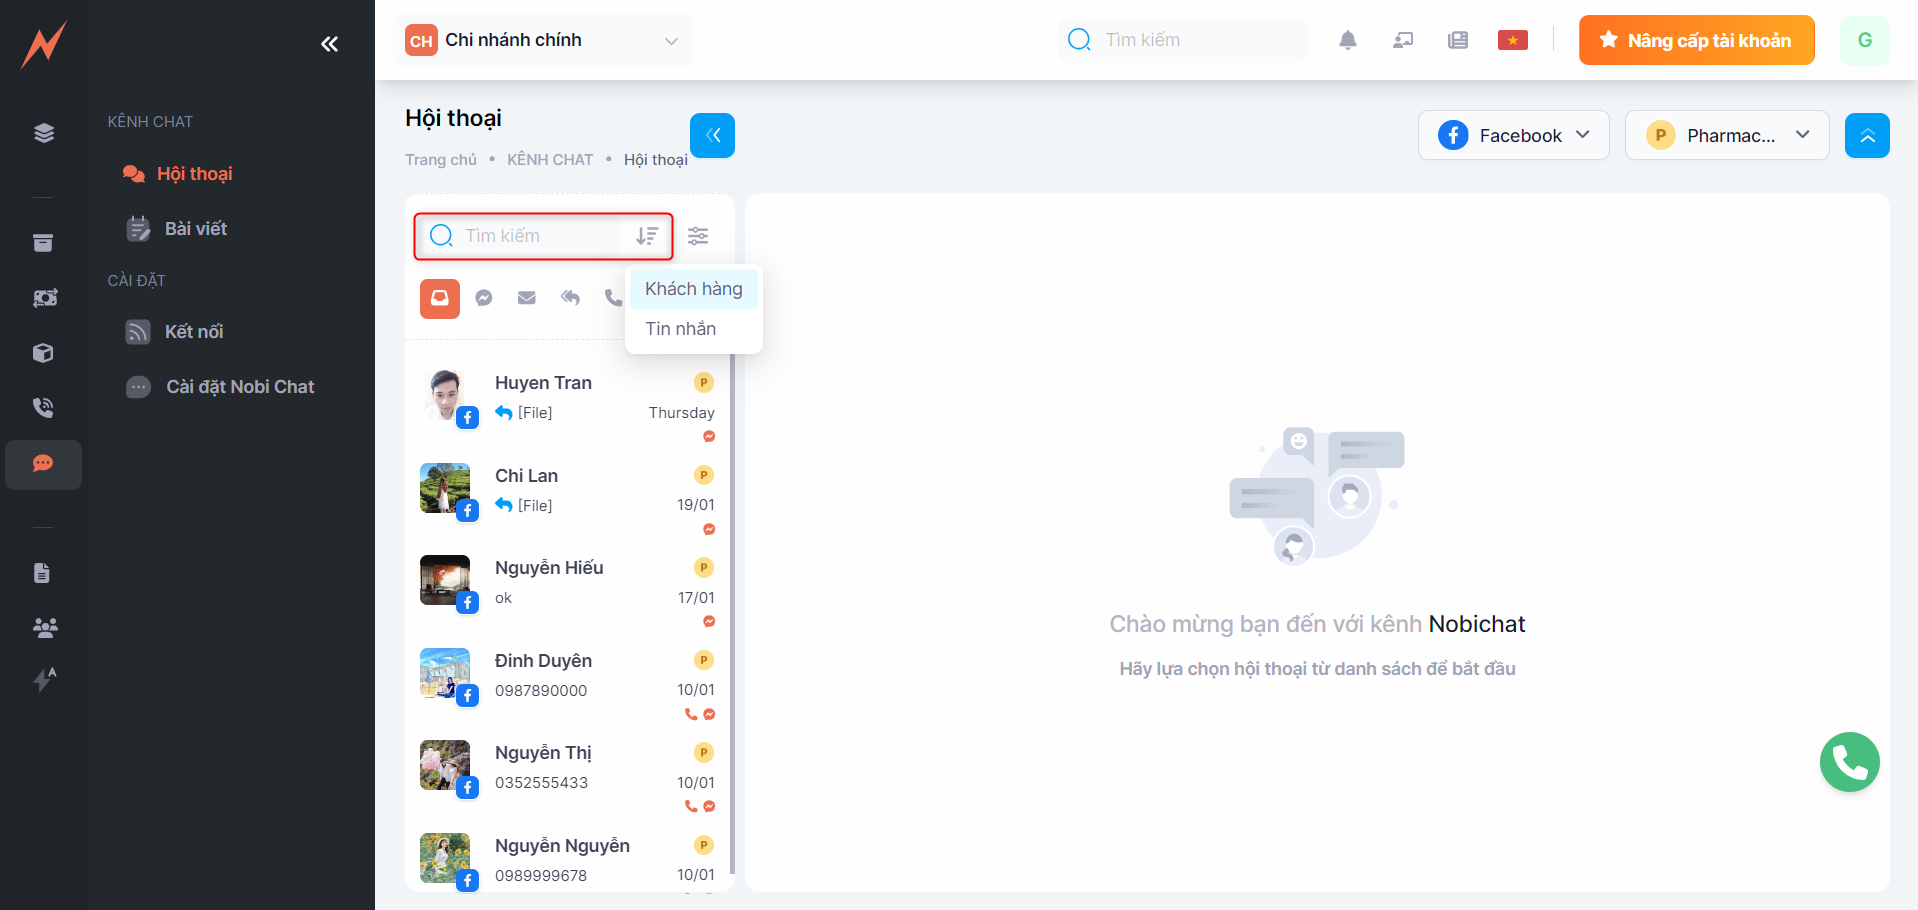
(2) Filter conversations by article/time/employee/conversation tag.
According to the article: Filtering which posts will display a list of conversations about that post.
Time: Filtering by time will display conversations with the last incoming/outgoing message at the filtered time.
Employee: Filtering by employee will display a list of conversations handled by the employee.
Tag: Filtering by tags will display a list of conversations tagged with the current filter.
Clear filter: Remove all current filtering conditions, returning to the original list of all conversations screen.

(3) Synchronize conversations: Sync old page conversations into the software.

3. Working with dialogue
Birthday Update: Update customer's birthday.
Assignment: Transfer the conversation to a designated user in charge.
Block Customer: When a customer is blocked, the page cannot send messages to the customer, nor can the customer send messages to the page.
All User Conversations: View all conversations including inbox and comments from that customer.
Mark as Unread: If a conversation has been viewed, clicking mark as unread will revert it to unread status.
View on FB: Link to the customer's conversation on the Meta Business Site.
Convert Conversation to Lead: Convert conversations with a phone number into leads, which will be saved to the branch set up in Nobi Chat settings. This action button will be displayed in case of the setting "User manually converts conversations to leads".
Guide to converts conversations to leads: Click here
Note: Create notes for the customer
Copy link: Copy the customer conversation link
History: View the history of tagging/assigning conversations.
Processing: Conversations that meet the criteria of being tagged + customer responded will be moved to processed, if one of these two conditions is missing, the conversation is still being processed.

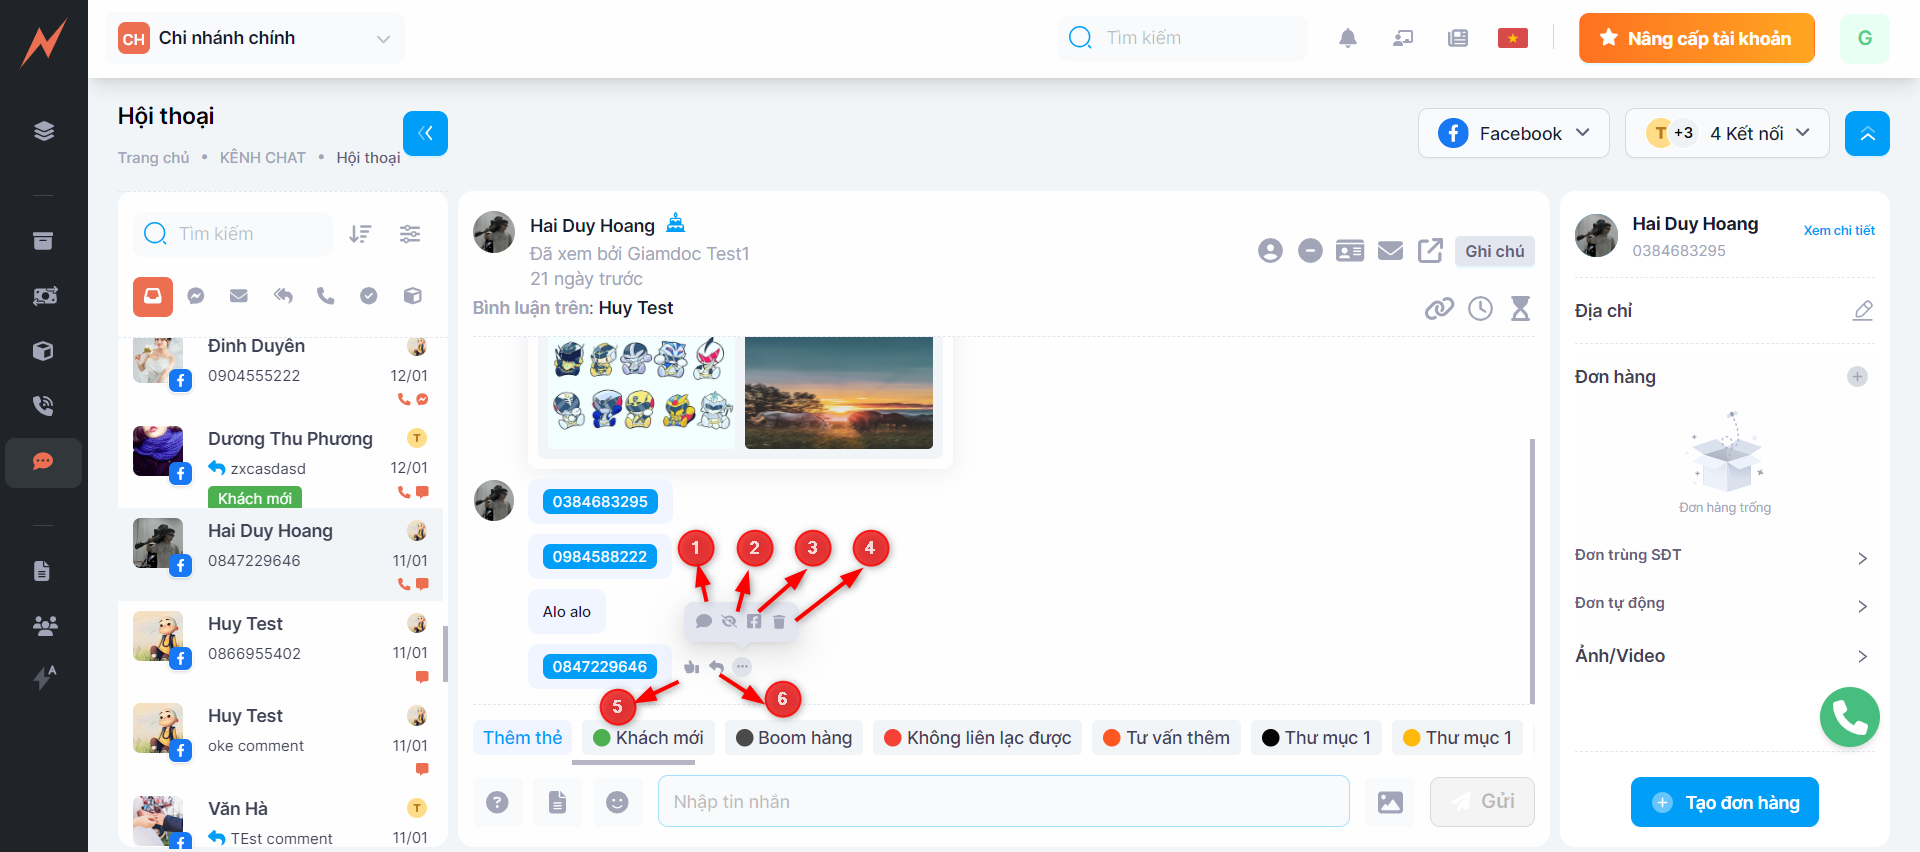
For conversation as messages, you can perform the following operations:
Shortcut keys and tips: Open the shortcut keys and tips view, displaying key combinations that allow users to operate quickly.
Send template messages: Display a list of template messages that allows searching by name/content/order, select a template message to send.
Send emoticon: Display a list of emoticons for users to choose and send.
Send image/file: Display the image/file management screen that allows users to select and send.

For conversations that are comments, you can do the following:
Reply comment
Like comment
Quote comment
Message the customer from the comment
Hide the comment
View comments on Facebook
Delete the comment
(11)Tagging conversations: Use existing tags to assign to conversations or create new tags. content_copy

3. View Customer Details
4. Update Customer Address
Recipient Name: Customer's name from the conversation
Phone Number: Capture the customer's phone number sent to the page. The phone number can be changed. After changing, the customer details will use the updated number as the main contact.
Detailed Address: The customer's detailed address. If the customer sends an address to the page, the user can copy and paste that address into the detailed address field, and the system will automatically fill in the fields below.
Province/City Address: The user can select or it will automatically be filled in from (3)
District Address: The user can select or it will automatically be filled in from (3)
Ward/Commune Address: The user can select or it will automatically be filled in from (3)

5. Order List
Display the list of customer orders, which are orders created in Nobi Chat, Nobi Pos, Telesale for that same customer. You are allowed to perform operations:
Edit order
Delete order
Confirm order
Cancel order

5. List of orders with duplicate phone numbers
Display the list of orders from customers who have the same phone number as the customer returning from the conversation.

6. Automatic Order List
Display a list of orders automatically created when a customer sends a phone number or comments with a keyword.
**Note:
Bạn phải bật option tự động tạo đơn hàng hoặc thiết lập từ khoá tạo đơn hàng tự động
Hướng dẫn thiết lập tạo đơn tự động: TẠI ĐÂY

7. Photo/Video List
Display images/videos the page has sent to customers and customers have sent to the page.

8. Creat New Order
If you want to create a ticket for a conversation, click on that conversation -> Press Create Ticket -> The ticket form will be displayed on the right side of the screen.
Select the order source (if available). If there is no source, you can also create one directly in this view
Choose the product the customer wants to buy
Enter the customer's address
Enter customer service notes (if any)
Enter delivery notes (if any)
Select a promotion (if any). Each promotion code applies to one customer; if the customer does not have a promotion code, you need to create a new one. Instructions for creating a promotion code: HERE
Click on "Create order" to proceed to the payment screen.

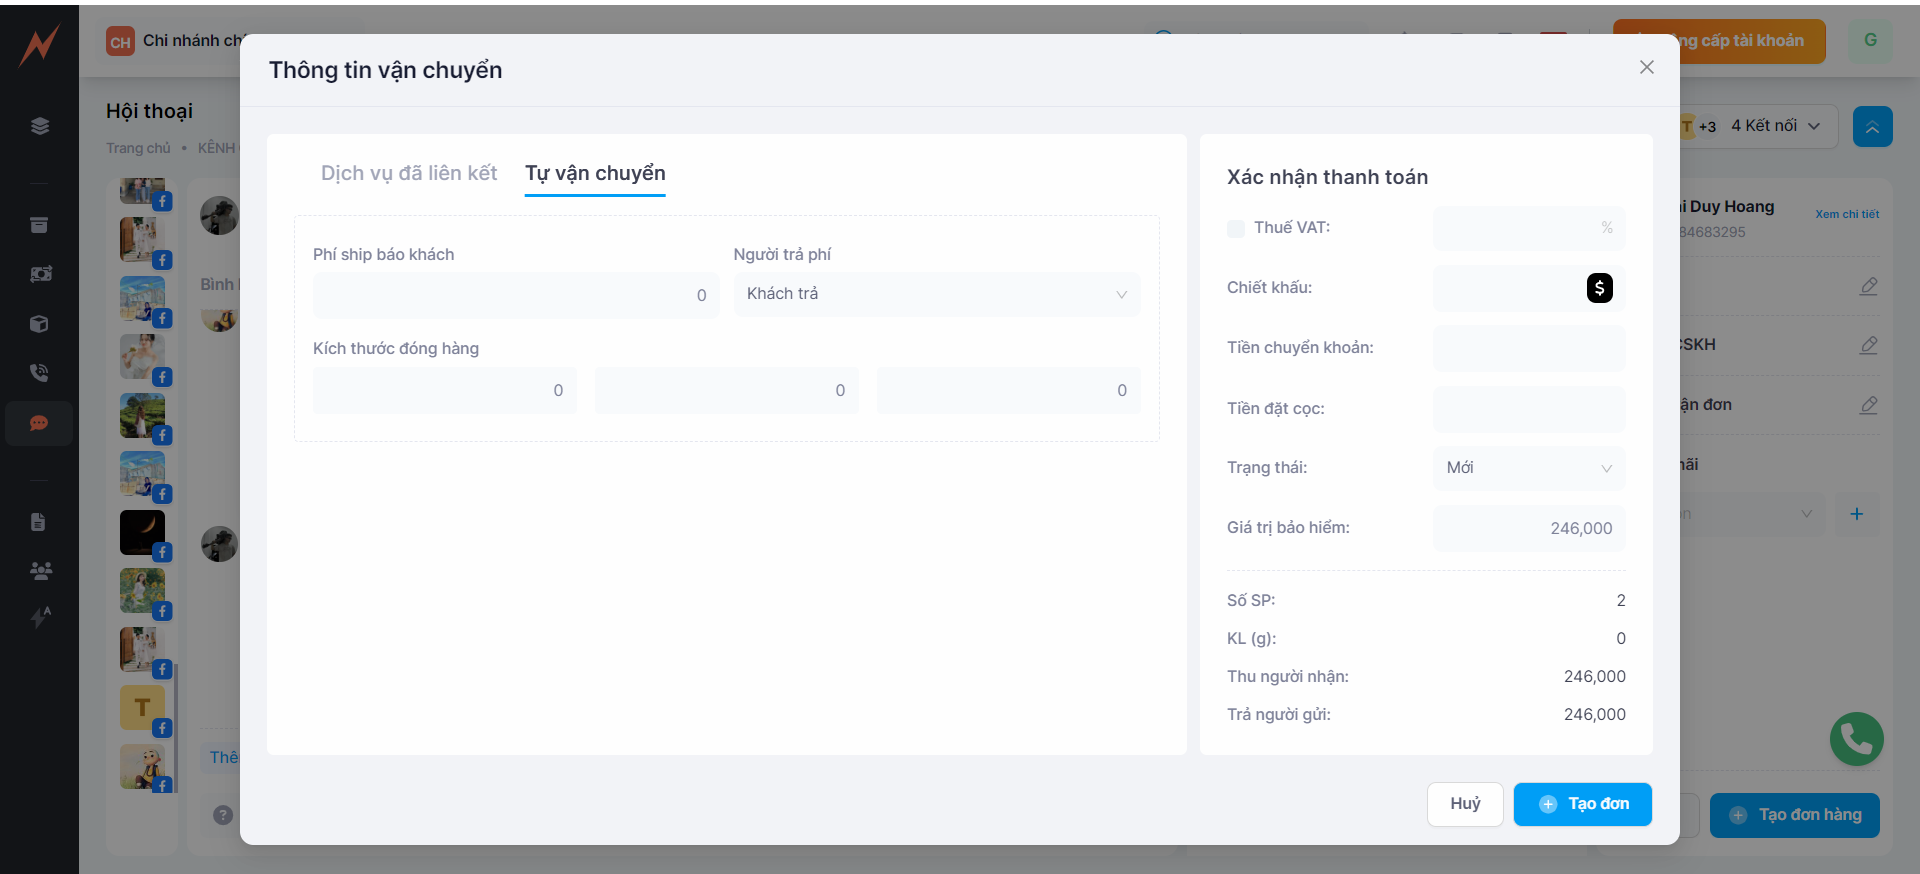
For orders without customer address information:
If you create an order without address information, after clicking the Create Order button, the screen will switch to the shipping information, with the default option "Self-shipping". At this screen, you can:
Enter shipping fee (if applicable)
Choose who pays for shipping
Enter packaging dimensions Select VAT (if applicable)
Discount (if applicable)
Bank transfer amount (if applicable)
Deposit amount (if applicable)
Status: Select the order status after saving
Insurance value: Default is displayed according to the value of the goods, you can change it
For orders that already have customer address information:
If you create an order with address information, after clicking the ''Create Order'' button -> The screen will switch to shipping information, displaying the linked service screen.
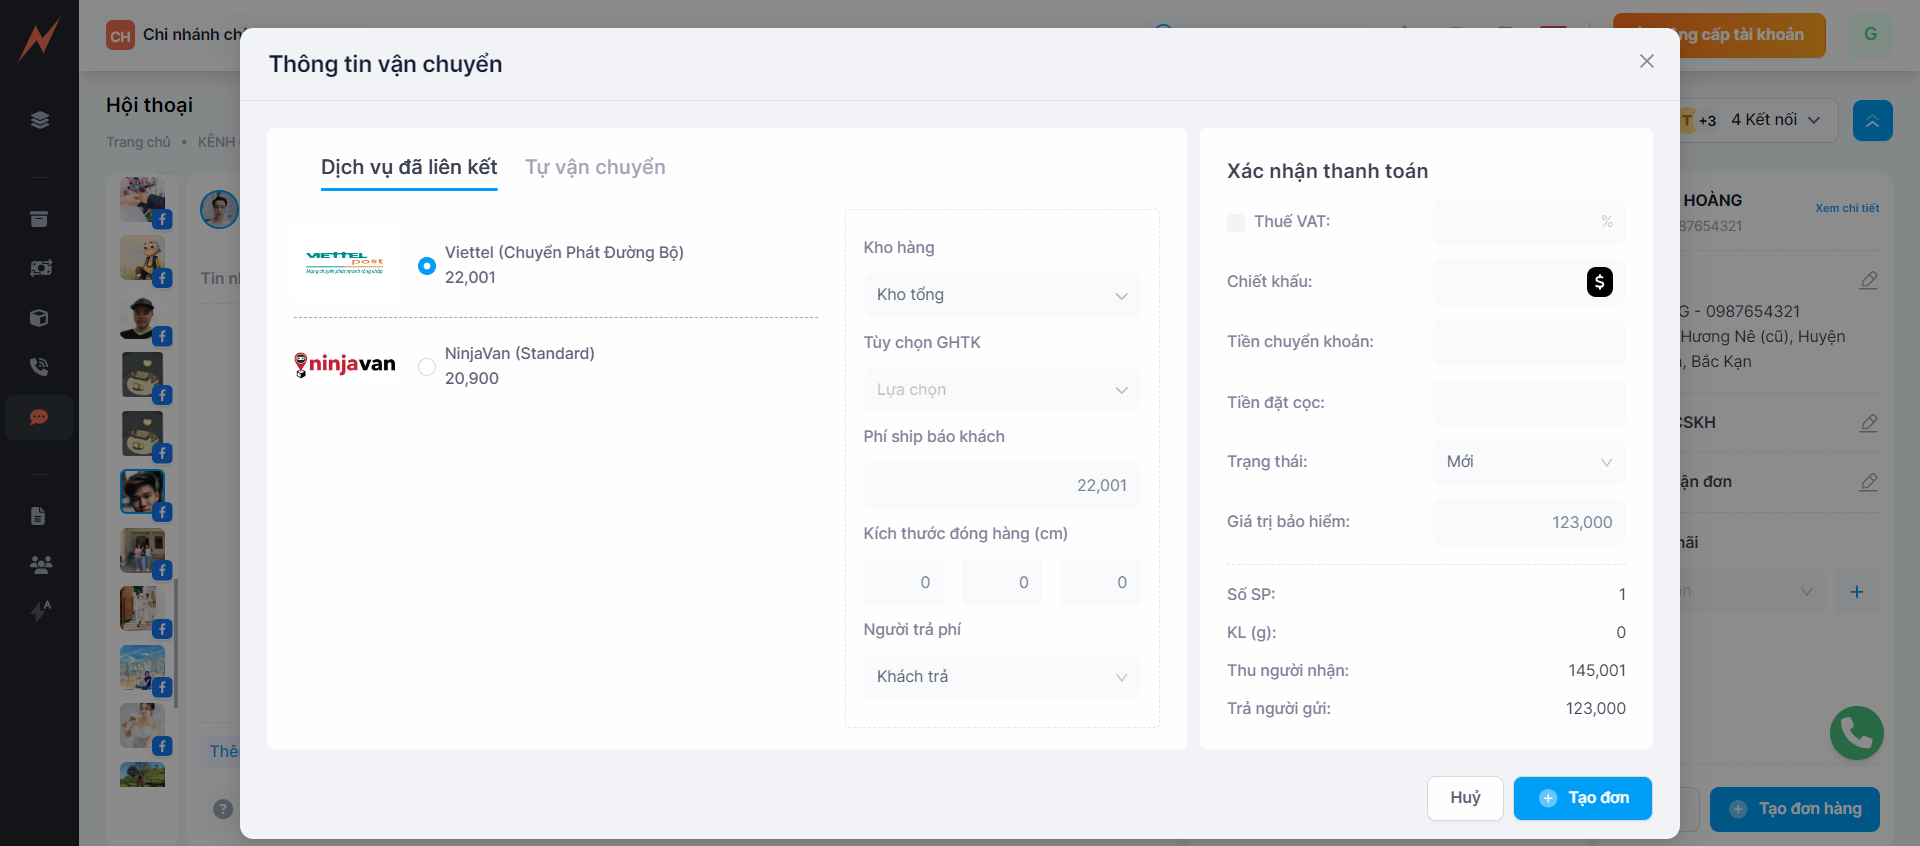
After successfully creating the order, the system will display the conversation details on the screen, showing the newly created order in the order list.
Last updated