NOBIV2 SUPPORT CENTER
  • OVERVIEW
    • Dashboard
    • Performance Tracking
      • Marketing Effectiveness
    • Shipping Report
      • Order Report
        • Overview
        • Statistics Of Returned Orders
      • Inventory Report
      • Import & export report
      • Delivery Report
    • Sale Report
      • Sale Agent Ranking
      • Revenue Report
      • Sales Report
      • Sale's data report
    • Maketing campaign
      • Ads Channel Report
      • Coupon usage
  • CUSTOMER
    • Customer
      • Add customer
      • Manage Customers
      • Customer Detail
      • View Settings
      • Export Customer File
      • Transfer Customer Group
      • Transfer into lead
      • Reassign to other staff
      • Transfer to another branch
      • Share branch
      • View customer purchase history
    • Customer Group
    • Customer Source
    • Coupon
  • NOBI CHAT
    • Conversation
      • Facebook conversation
      • Zalo conversation
      • Shopee conversation
      • Lazada conversation
    • Posts
    • Setting
      • Connect
        • All
        • Facebook
        • Shopee
        • Lazada
        • Zalo OA
      • Nobi Chat setting
        • Facebook
        • Nobi San
        • Zalo OA
  • NOBI SALE
    • Lead Management
      • Import/export lead file
      • Add Lead
      • Lead Devide Configuration
      • Action with Lead
    • Telesales
    • Voip Switchboard
    • Tasks / Results
      • Setting
      • Tasks
      • Results
  • NOBI POS
    • Order
      • Over view
      • Nobi
      • Shopee
      • Lazada
      • Tiktok
    • Handing over to Shipping unit
    • Cross-check
      • Payment Cross-check
      • Return order Cross-check
  • PRODUCTS
    • Product Management
      • Nobi Product
      • E-commerce Product
        • Shopee Product
        • Lazada Product
        • Tiktok Product
      • Product portfolio
    • Supplier Management
      • Supplier
    • Warehouse Management
      • Goods receipt
      • Warehouse transfer note
      • Imported return slip
      • Cancellation slip
      • Refund receipt
      • Ecommerce
      • Missing goods receipt
      • Inventory checking sheet
  • AUTOMATION
    • Automated customer care
  • MARKETING
    • Marketing Campaign
      • Overview
      • Campaign Lists
    • Customer support campaign
      • Overview
      • Customer support campaign
      • Setting
  • App Store
    • All Application
      • Payment History
    • Print Sample
  • CHANNEL CONNECTION
    • Connect Channel
    • Connect to Delivery Firm
    • Seller application
      • Connect to Kiotviet software
      • Connect to Nhanh.vn
    • In-store Sales
    • Landing Link
  • SETTING
    • General Setting
      • Setup company information
      • Setup Company
        • Warehouses
        • License
      • Setting Customer
        • General Setting
        • Coupon Type
        • Customer Group
        • Customer Source
        • Tagging Customer
      • Nobi POS
        • Order Source
        • Add Order Tag
        • In-store Sales
        • Setup Order Displayed
        • Print Order
        • Product and Order Source
        • Inventory
        • Packing and Shipping
        • Discount and Refunds
        • Other Settings
      • Nobi Chat
        • Install Facebook
        • Install Zalo
        • Install Shopee Chat
        • Install Lazada Chat
      • Nobi Marketing
        • Campaign Group
        • Ads Channel
        • Connect Type
        • Form Web đăng kí
        • Key API
      • Nobi Automation
        • Automatic MKT group
      • Data fields
        • The field displays customer
        • The field displays company
        • The field displays contract
        • The field displays product attribute
      • Other Setting
        • Contract category
        • Danh mục báo giá
        • Cash book type
        • Trạng thái công việc
        • Danh mục tài liệu
        • Payment methods
        • Loại chi phí chiến dịch
        • Loại chi phí cÆ¡ há»™i
    • Branches
    • Departments
    • Position and authority
    • Staff
Powered by GitBook
On this page
  • I. Synchronization product
  • II. Edit Tiktok Product
  • III. Edit History
  • IV. Disconnect Product
  • V. Pairing product details
  • VI. Product details
  1. PRODUCTS
  2. Product Management
  3. E-commerce Product

Tiktok Product

PreviousLazada ProductNextProduct portfolio

Last updated 1 year ago

I. Synchronization product

Step 1: Click on button "Sync"

Step 2: In the sync view, select the store and option you wish to synchronize.

Step 3: Click on button "Sync" and wait for the product synchronization process to complete

Synchronization options:

(1) Auto Pairing: You can pair the Tiktok product with the Nobi Pro product by name or SKU code.

(2) Keep product Shopee intact after pairing: If turned ON, the product quantity on Nobi Tik will be taken from the inventory on the Shopee. If turned OFF, the product quantity on Nobi Shopee will be based on the Nobi Pro inventory and pushed to the Shopee

(3) Automatically create products on Nobita: If a product is available on the TikTok shop but not yet on Nobi Pro, turning ON will automatically create a new product in Nobi Pro.

(4) Synchronize inventory fluctuations: Orders placed on Shopee will deduct from the Nobi Pro inventory, and changes to the Nobi Pro inventory will update on the Shopee.

***Note: For the feature "Deduct inventory in Nobi Pro when processing Tiktok orders", if the product in Nobi Pro has been linked with Tiktok, when there is an order on Shopee, the inventory on the Nobi Pro system will also be deducted. At this point, the system will automatically generate a "Tiktok Sales Order".

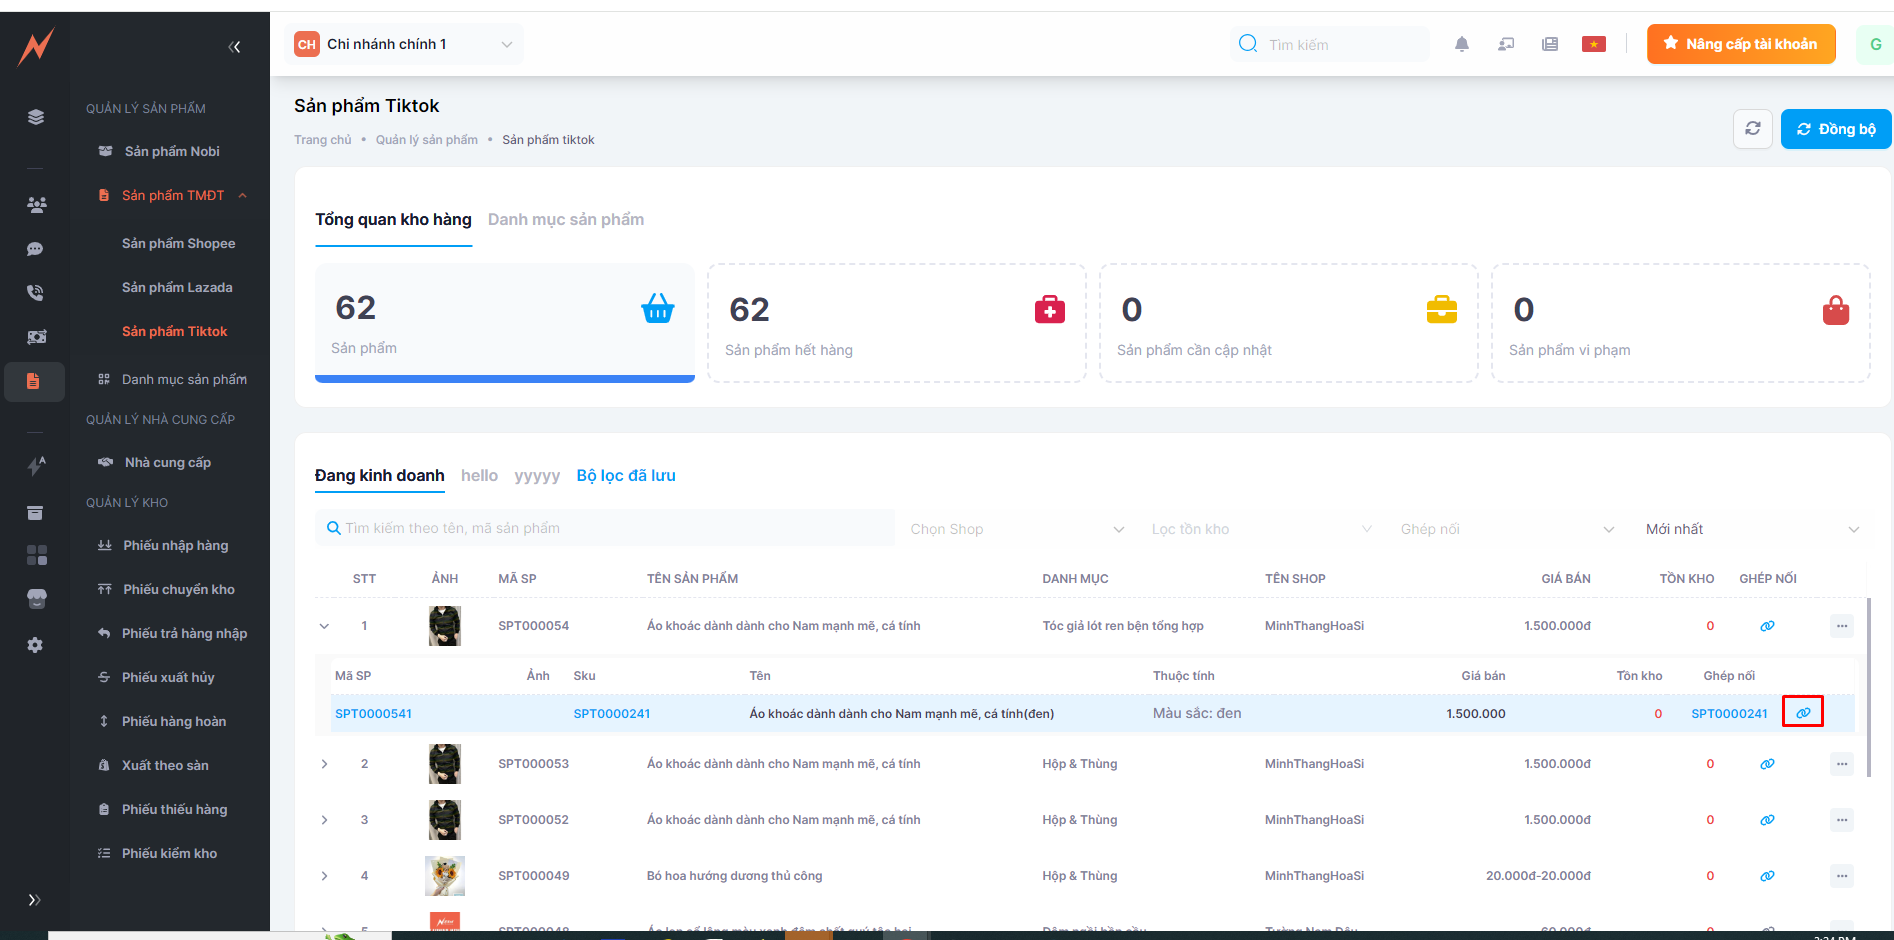
Products that have been paired will have a link icon on the right side, as shown in the image below.

II. Edit Tiktok Product

Step 1: At the list screen, click the expand icon, then click "Edit".

Bước 2: In the product edit view, fill in all the information.

Bước 3: Click on button "Save"

III. Edit History

Record history log: concatenate, create orders, deduct inventory, ...

Step 1: On the list screen, click the expand icon, then click on "Edit History"

Step 2: View information on all modifications will be displayed.

IV. Disconnect Product

Step 1: On the list screen, click on the child product, then click "Disconnect Product"

Step 2: View the Disconnect pop-up, click the button "Cancel Pairing"

V. Pairing product details

Click on the child product pairing code.

View pairing code details.

VI. Product details

At the product management interface, to view product details, click on the product you want to examine. Detailed information about the product will be displayed as shown in the image below.