
Imported return slip
The Nobi Pro system integrates a feature to return goods to suppliers, helping users easily track the number of goods returned and the quantity of remaining goods in the system.
After receiving goods, the situation of defective and damaged goods is unavoidable. For defective products, manufacturer's faults, you have the right to return to the supplier according to the policies and terms in the contract. Therefore, to easily manage the quantity of goods before and after returning, Nobi Pro system integrates the supplier return feature.
To set up transfer and manage transfer, you go to Products -> Imported return slip. The interface will be displayed as shown below.

I. Add imported return slip
To add a new return voucher, at the restaurant return management interface, please follow these steps:
Step 1: Click on button "Create imported return sl
Step 2: In the view, create a complete information entry form -> click the "Add new" button.

II. Edit Voucher
To update a return purchase order in the interface for managing the list of phiếu trả hàng nhập, please follow these steps:
Step 1: Click on three dot to the left of the voucher -> click "Edit Voucher"

Step 2: At the Edit Voucher Form , change information and click button "Save"

III. Cancel Voucher
Step 1: Click on three dot to the right of the voucher -> click "Cancle Voucher "
Step 2: At the Cancle Voucher form -> click button "Agree"

IV. Export Excel according to filter results
In the interface for managing return purchase orders, to export an Excel file based on the filter, you click as shown below:

V. Export selected excel order
In the interface for managing return purchase orders, to export an Excel file based on selected orders, follow these steps:
Step 1: Select Voucher
Step 2: Click button "Tools"
Step 3: Click on "Export selected excel order "

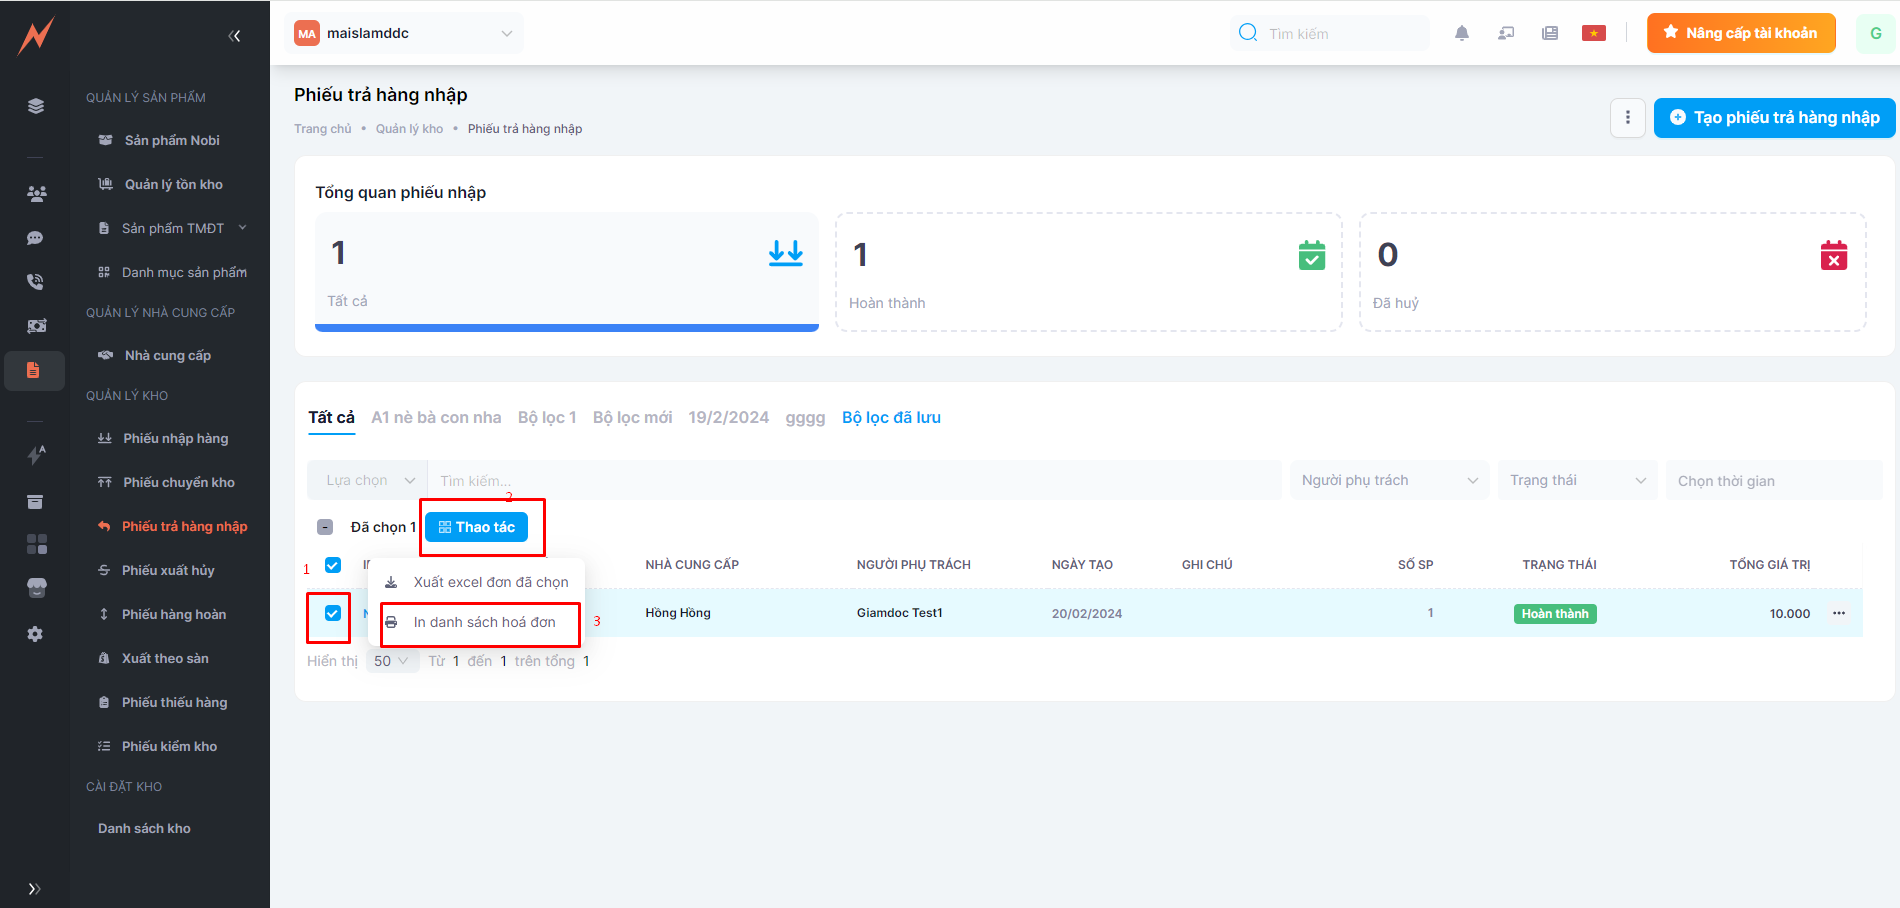
VI. Print Voucher
Tại giao diện quản lý phiếu trả hàng nhập, để in phiếu, bạn thực hiện như sau:
Step 1: Select Voucher
Step 2: Click button "Tools"
Step 3: Click vào "Print invoices list"
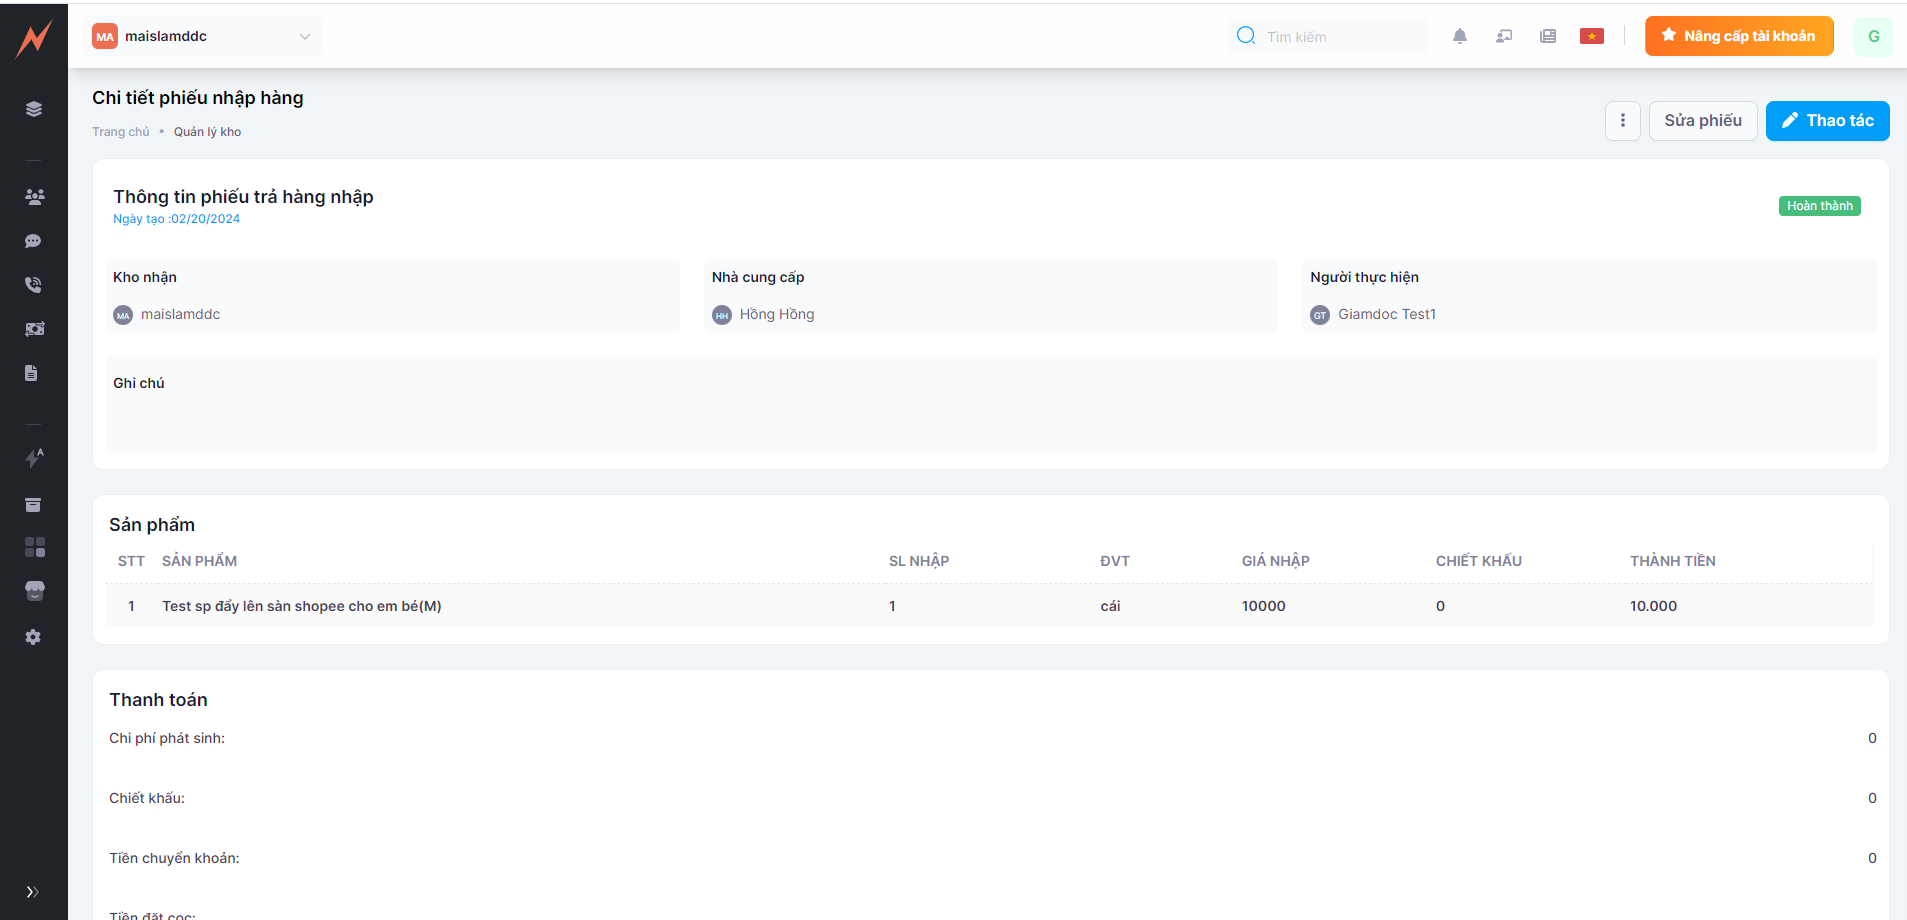
VII. View details of the voucher
In the interface for managing purchase orders, to view details, you click on the order ID link.

The detailed information will be displayed as follows:
Last updated