
Connect to Delivery Firm
The carrier integration feature assists online retailers in managing logistics and distributing products to customers
In the era of technological advancement and the explosion of the Internet, instead of visiting physical stores to make purchases, most consumers tend to shop online. No matter where they are, regardless of the distance, they can order the items they desire. Therefore, it is essential for e-commerce businesses to partner with logistics companies to ensure the swift distribution of goods to their customers.
To assist online retailers in easily managing their orders shipped through courier services, keeping track of order status, and managing the costs to be collected or paid to the courier, Nobi Pro has integrated a feature that connects with the shipping company. With just a few mouse clicks in the software, a delivery team is promptly arranged to pick up the products and distribute them to customers.
So how do we connect the shipping units with Nobi Pro? Let's explore.
Firstly, on the Nobi Pro admin page, you need to go to Sales Channels -> Connect to Delivery Company. The interface will be displayed as shown in the image below.

1. Add delivery company
**Requirement: You must have registered an account with the delivery company you wish to connect with and ensure that this carrier is integrated with Nobi Pro.
To add a new delivery company, please follow these steps:
Step 1: Click "Add delivery company" -> A list of shipping carriers is displayed.
Step 2: Select the shipping carrier you wish to connect -> Click "Continue"

Step 3: Fill out the form with all required information, mandatory fields are marked with an asterisk -> Click "Continue"
** Note: For each different shipping carrier, you will need to provide various details.

Step 4: Set up additional services for the connected shipping account
Step 5: Click "Connect"
2. Setting up an add-on service
After connecting with the delivery company, you can set up the carrier's additional services. To configure, please follow these steps:
Step 1: Click to select the connected carrier account -> Form "Shipping carrier details"
Step 2: Select the services you wish to utilize from the offerings provided (you can review the additional service price list before making your selection)
Step 3: Click "Save" to set up

3. Update delivery company
To update the carrier, you need to follow these steps:
Step 1: Click on the three dots in the delivery company list
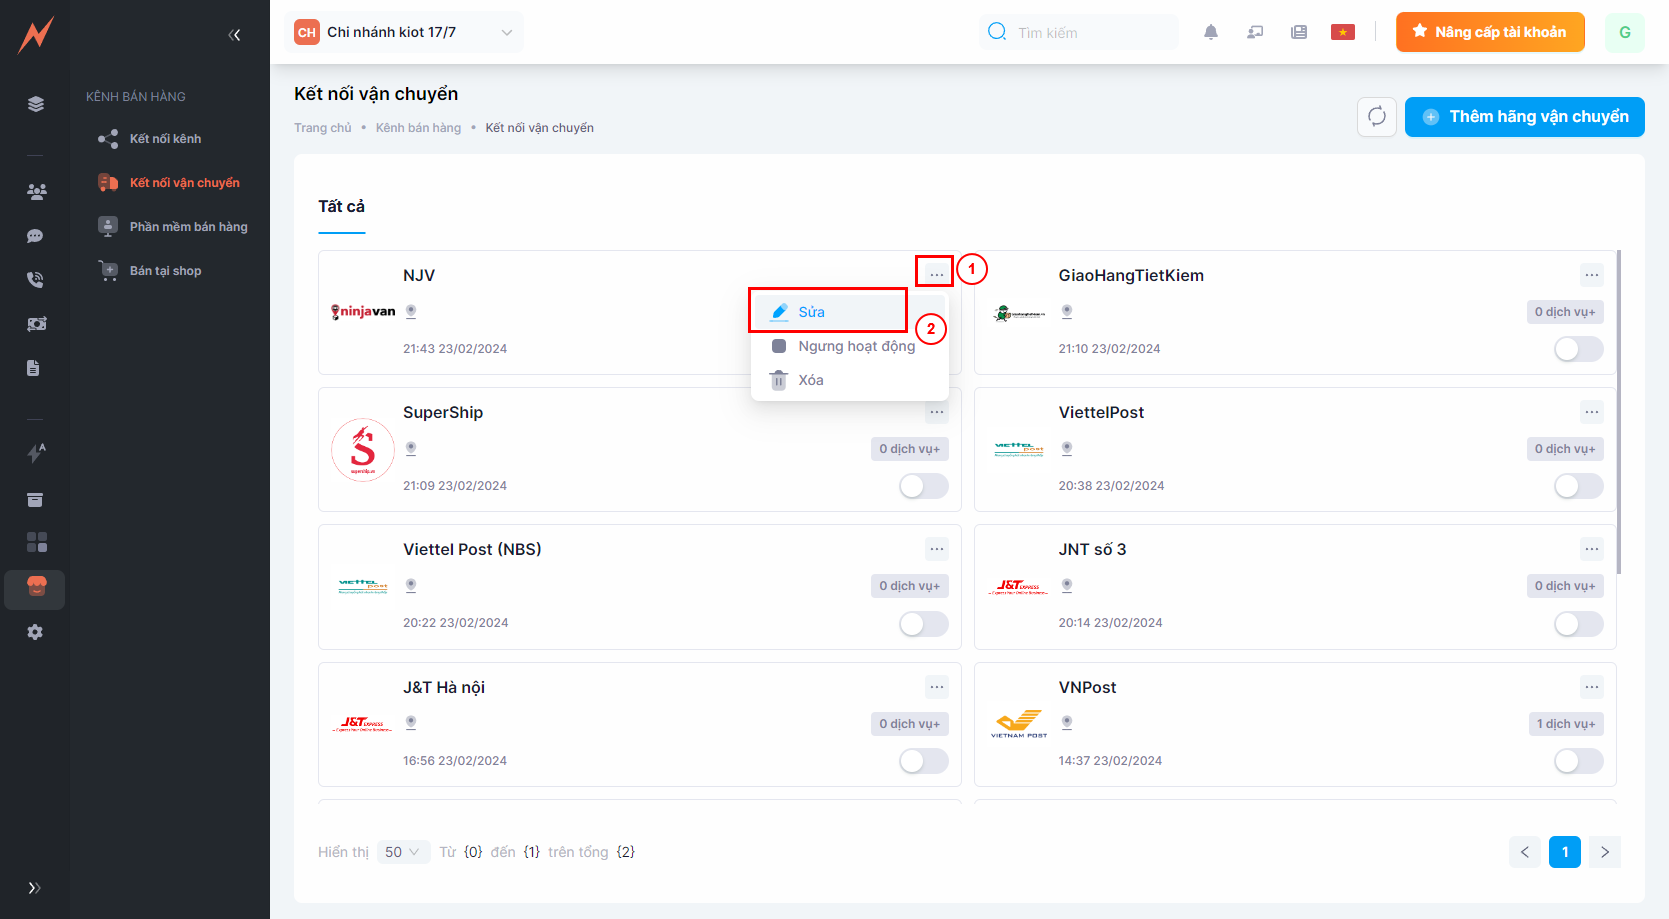
Step 2: Click on "Edit" -> Update Form appears
Step 3: Enter the information to be updated
Step 4: Click "Update"

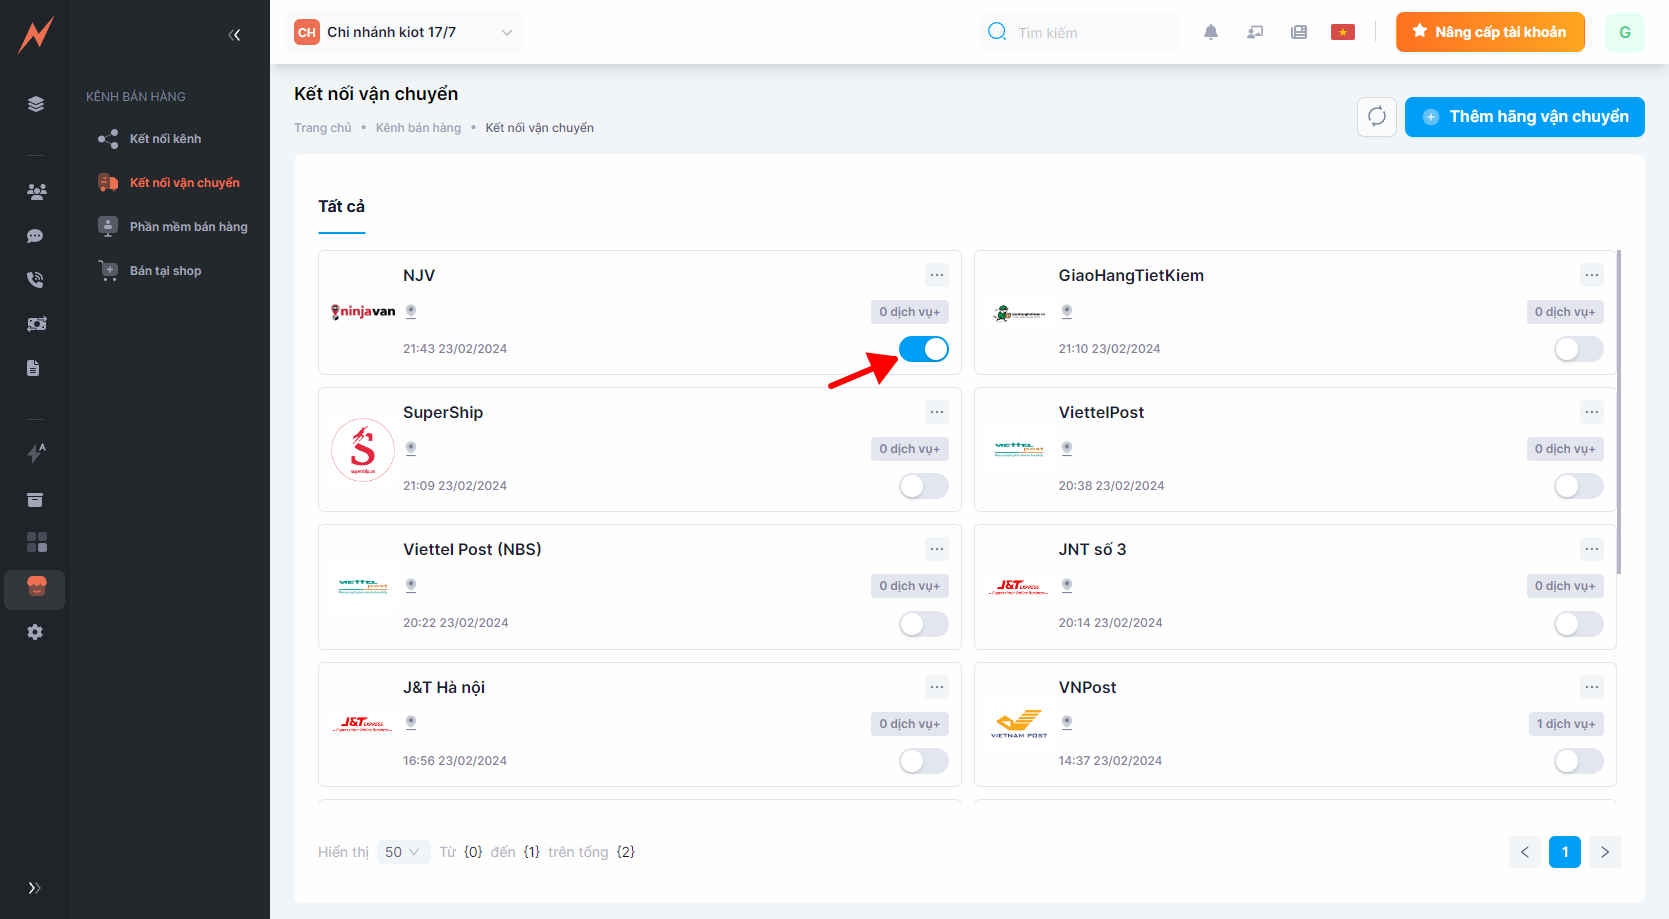
4. Enable/Disable carrier
In the event that a carrier is discontinued, for new orders when switching to a different delivery service, you will not see the carrier that has been turned off.
5. Disconnect/Remove Carrier
If you wish to discontinue a connection or remove a carrier, within the Nobi Pro system you can perform the following actions:
Step 1: Click on the three dots in the delivery company list
Step 2: Click "Delete"
Step 3: Click "Delete"


Last updated