# Nobi Product
**I. Menu**
1. ***All Product:***
* The total of all Nobi products When clicking on the Nobi Products menu, the Inventory Overview tab and the All Products index will be selected by default. The fixed filters: Active, Discontinued will appear.
2. **Product out of stock:**
* The product has a stock quantity less than or equal to 0.
* When clicking on the tab, the fixed filters displayed are: Active, Discontinued.
3. **Inventory alert product:**
* These are products that have been set with a maximum inventory alert (Inventory alert other than 0) and Product inventory is greater than or equal to the established maximum threshold.
* When clicking on the tab, it displays: Maximum inventory alert, Inventory discrepancy alert.
4. **The product has been integrated onto the e-commerce platform.**
* Count the total number of products that have been connected and not yet connected to the platform.
* When a user clicks on the number of products already connected to the platform, fixed filters: Connected, Not Connected will appear.
5. **Import new stock immediately.**
Product stock running low alert
**II. Add new product**
**Method 1: Add new directly from the system**
Step 1: Click on button "Add product"
Step 2: Enter all required fields completely.
**\*\*\*Note: For products with multiple attributes, please turn ON the attributes and add them to the form**.
Step 3: Click on button "Add"
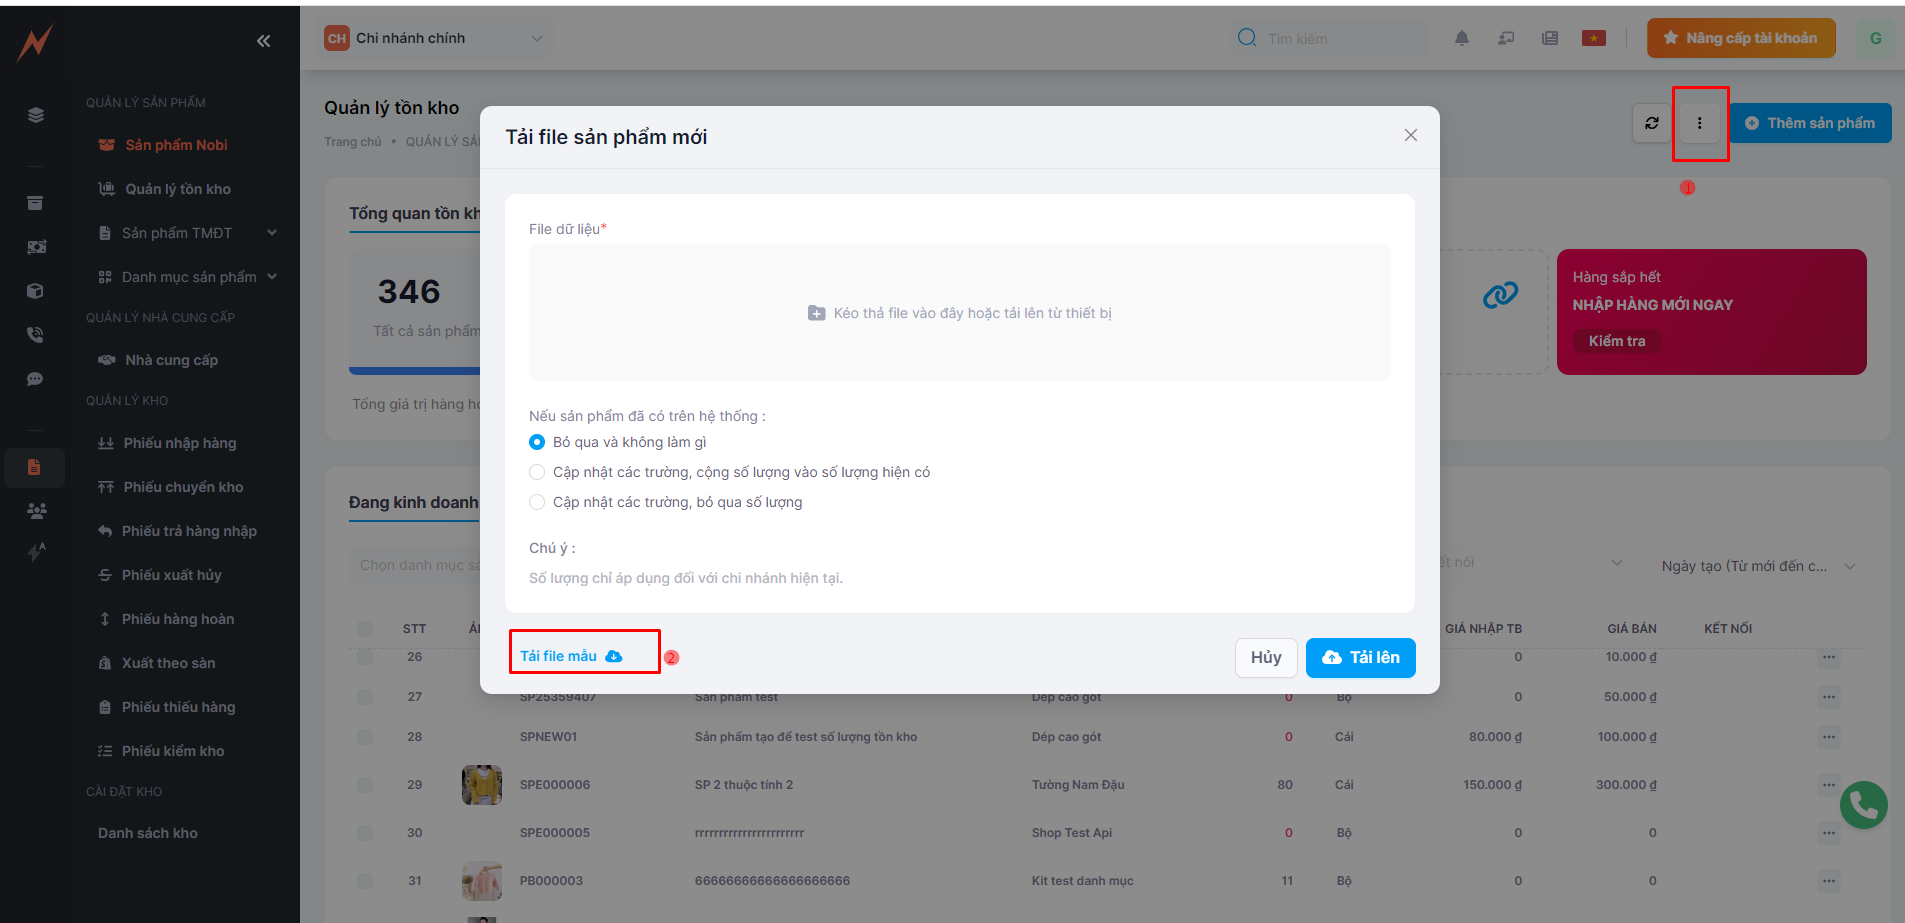
***Method 2: Import From Excel File***
**\*\*\*Note:** The file uploaded to the system must match the template provided by the system. You need to download the template and populate it with your data to prevent errors during the upload process.
Step 1: Click on "Expand" -> Select **"Import products from Excel"**\
Step 2: Click "Download Sample File"
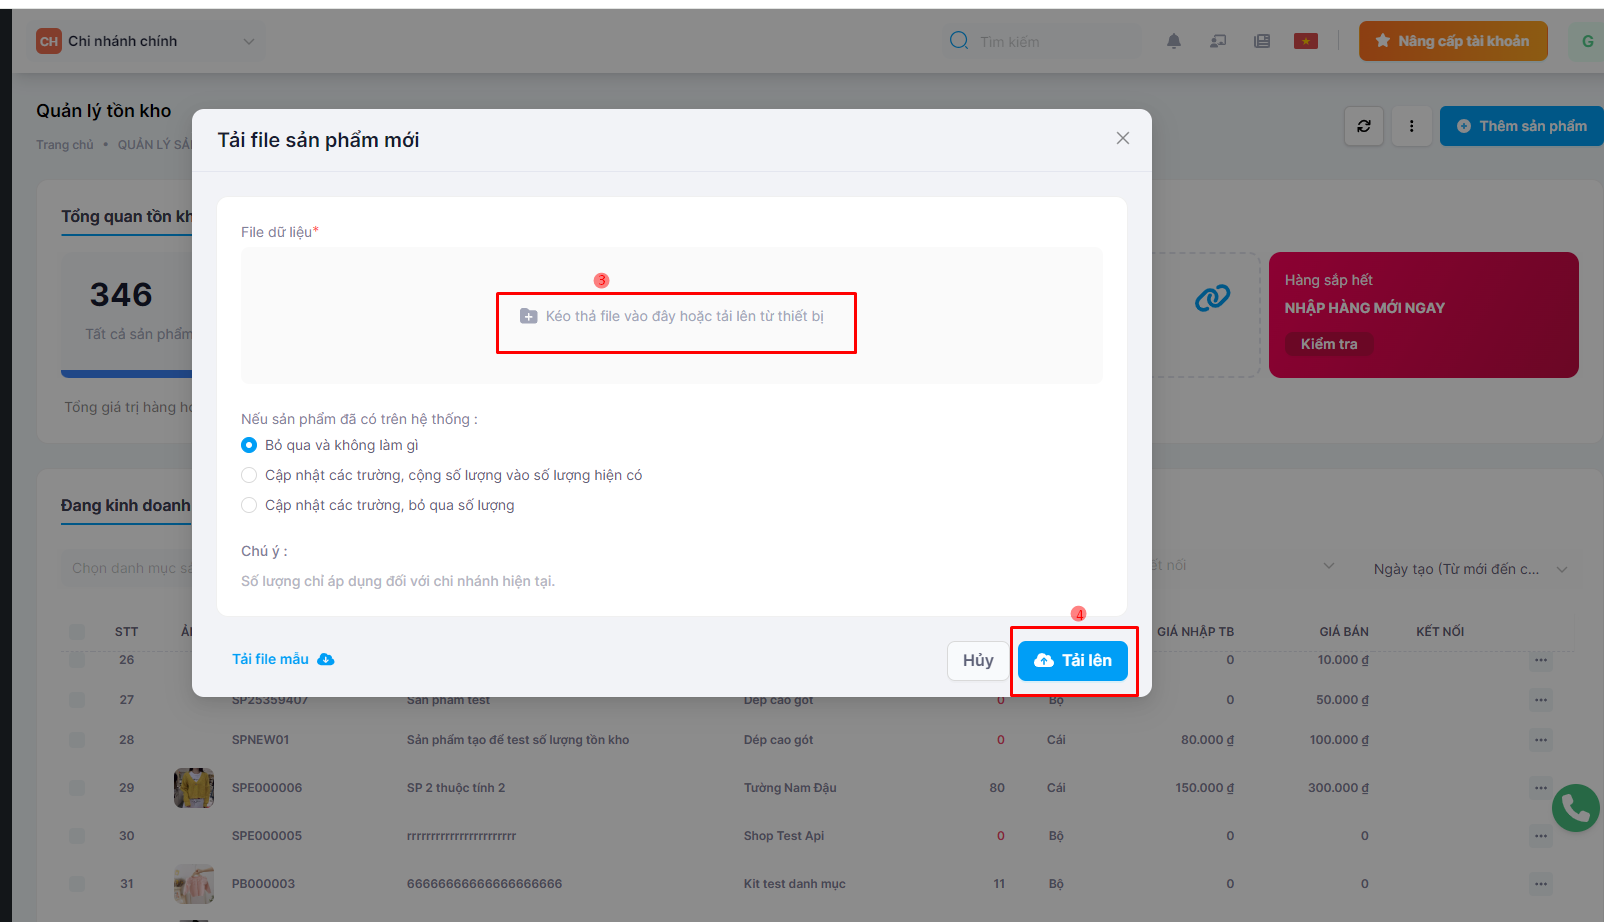
After downloading the template file and entering data into it, to upload the file to the system, please follow these steps:
Step 3: Click "Select File" (Select the Excel file you have just entered the product data into.)
Bước 4: Click "Upload"
Bước 5: Click close form
***Note: In cases where a product file is uploaded and the product already exists in the system***
* Ignore and do nothing: The product will be skipped.
* Update fields, add to existing quantity: Update the product fields, accumulating the quantity into the existing inventory in the system.
* Update fields, ignore quantity: Update the product fields and disregard the quantity.
* Update fields, overwrite quantity: Update the fields, replacing the quantity with the one from the Excel file.
**III. Update Product**
Step 1: Select the product you want to update, click on the three dots on the right side of the product.
Step 2: Click "Edit" -> Update Form is displayed
Step 3: Enter information into the update form
Step 4: Click "Update"
**IV. Delete Product**
To delete a product, please follow these steps:
Step 1: Select the product you want to delete, click on the three dots on the right side of the product.
Step 2: Click on "Delete"
Step 3: Click on "Delete"
**V. Export Excel File**
Nobi Pro supports users in exporting product files, including selected products or filtered products. The steps to export a file are as follows:
**Method 1: Download filtered product list**
**Method 2: Export selected product file**
Step 1: Select the product to export the file.
Step 2: Click button "Tools"
Step 3: Export selected product file
**VI. Open / Stop selling the products**
1. Stop selling the products
Step 1: Click tab "Selling"
Step 2: Select product
Step 3: Click button "Tools"
Step 4: Click Stop selling the product
2. Open Sale of Product
Step 1: Click tab "NOT Selling"
Step 2: Select Product
Step 3: Click button "Change product status"
Step 4: Open Sale of Product
**VII. Change product category**
Step 1: Select Product
Step 2: Click on "Tools"
Step 3: Click vào "Change product category" -> Change product category Form Displayed
Step 4: Change category
Step 5: Click button "Update"
**VII. Merger products**
Step 1: Select 2 or more products -> Click Tools
Step 2: Select "**Merger products**" -> Merger Products Form Displayed
Step 3: Merger Products
Step 4: Click button **" Merger "**
**VIII. Unpair the product**
Method 1:
Step 1: Select Product -> Click Tools
Step 2: Select "Unpair the product"
Step 3 : Click on button "Cancel pairing"
Method 2: có thể "Hủy ghép nối" ở phần chi tiết từng sản phẩm:
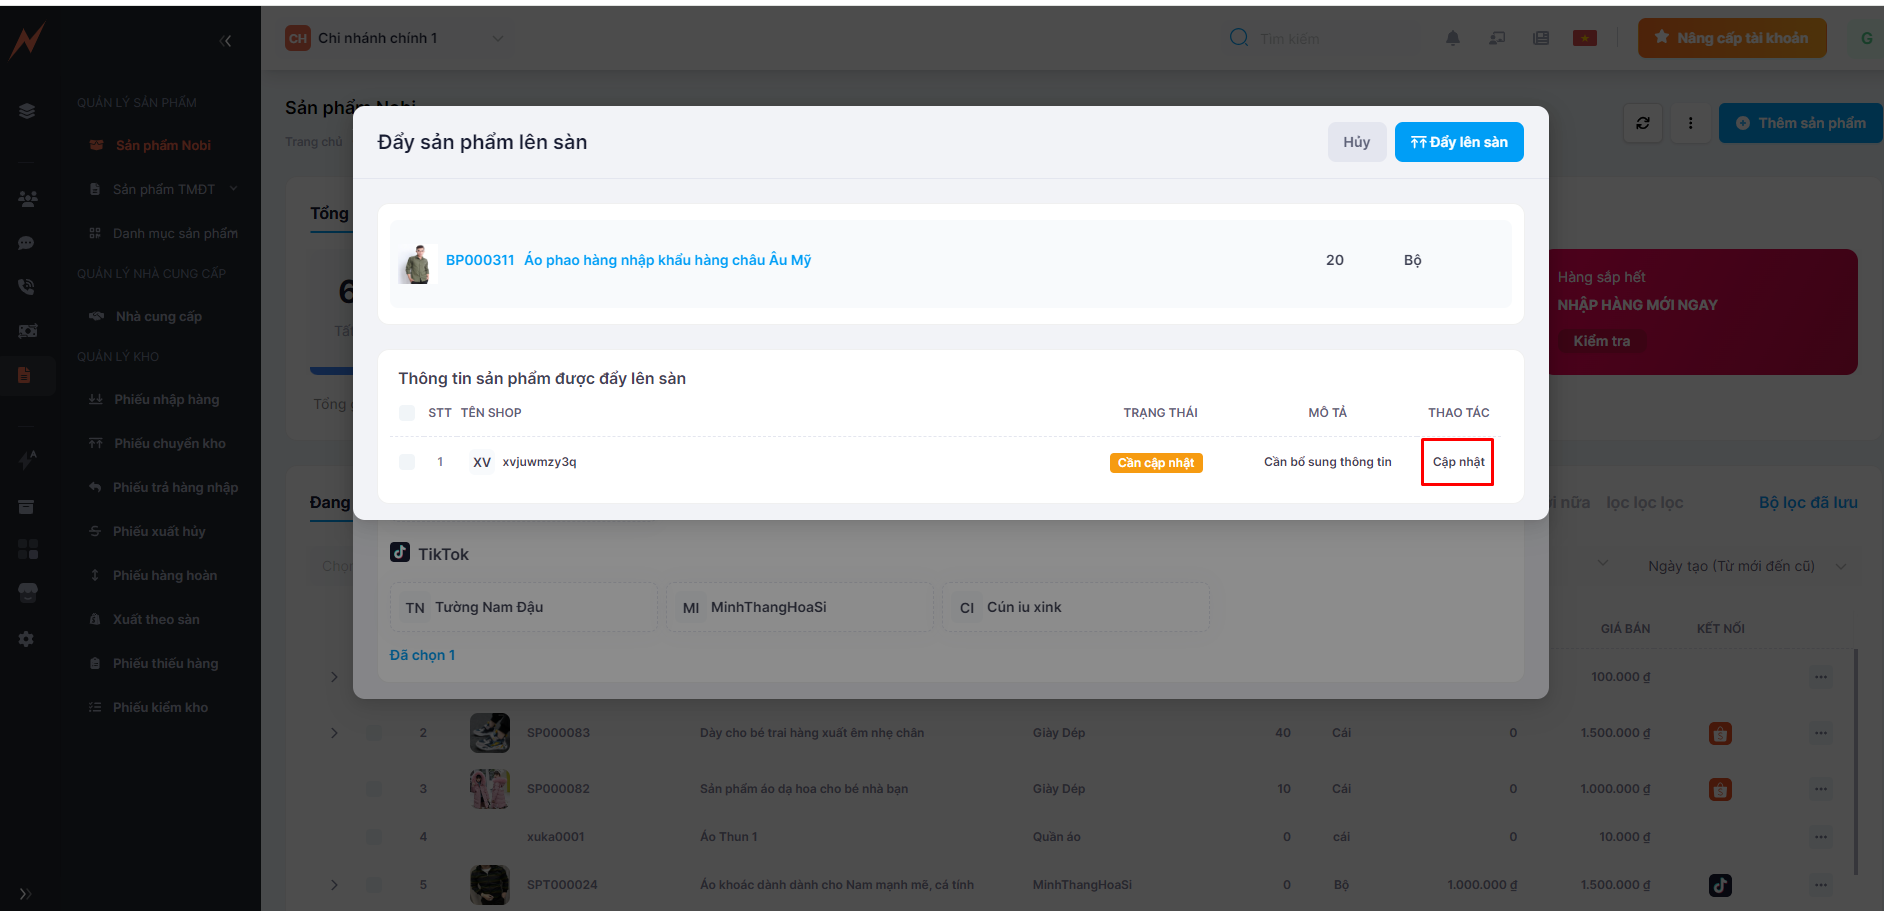
**IX. Sync products to E-commerce**
To Sync products to E-commerce, please folow these steps:
Step 1. Click on three dot to the right of the product , Select option "**Sync products to E-commerce**"
Step 2: Select the store to upload the product to.
Step 3: If the product requires information updates, click on "Update".
Step 4: Select Data -> Click button "Sync to E-commerce"
---
# Agent Instructions: Querying This Documentation
If you need additional information that is not directly available in this page, you can query the documentation dynamically by asking a question.
Perform an HTTP GET request on the current page URL with the `ask` query parameter:
```
GET https://helpv2.nobi.pro/products/product-management/nobi-product.md?ask=
```
The question should be specific, self-contained, and written in natural language.
The response will contain a direct answer to the question and relevant excerpts and sources from the documentation.
Use this mechanism when the answer is not explicitly present in the current page, you need clarification or additional context, or you want to retrieve related documentation sections.