
Telesales
This is the management module for all leads registered from the Form Option and those leads registered from Ladipage that are linked with the Form Option.
For leads coming from Form options or Ladipage linked with Form options, how can you determine whether those leads have placed an order or not? How can you assign a result to a lead after completing a task? Let's explore some features on the Telesale module of the Nobi Pro system right away.
1. Automatic tagging when processing orders, filter views by customer tags.
With a large influx of leads coming into the system from form options or landing pages, it can be quite challenging to review and process those leads that haven't been converted into orders. Understanding this difficulty, the Nobi Pro system has integrated an automatic tagging feature upon order creation. This means that as soon as you process an order, the lead will automatically be tagged as a customer, allowing you to easily filter through the orders by customer tags.
Step 1: Create customer card (Guide to Adding a Customer Tag TẠI ĐÂY)
Step 2: Filter the lead list -> Save the filter (In the "Exclude tags" filter, you will select the tags you do not want to display on the list)
Step 3: Create an automated process to tag customers after order placement. To set up the process, you need to navigate to Nobi Automation -> Automated Customer Service -> Add New Process -> Configure the campaign according to the required fields.
After completing the setup, any leads that have placed an order will automatically be tagged by the system as "Active'' This allows you to easily filter for leads that have placed an order or those that have not, for further processing.
If you prefer not to have the system automatically tag customers, you can also manually assign tags to leads.
In the telesale list, you can click on the (+) next to the "TAG" field to select and assign a card to the lead.
2. Receive leads
In the "Lead Management" section, you were guided on how to Lead Devide Configuration
In the case of auto-lead assignment configuration: On the Telesale interface, you will see a "Receive leads'' button. And the number of leads you can receive will be equal to the number of leads you have set up in the auto-lead assignment configuration.
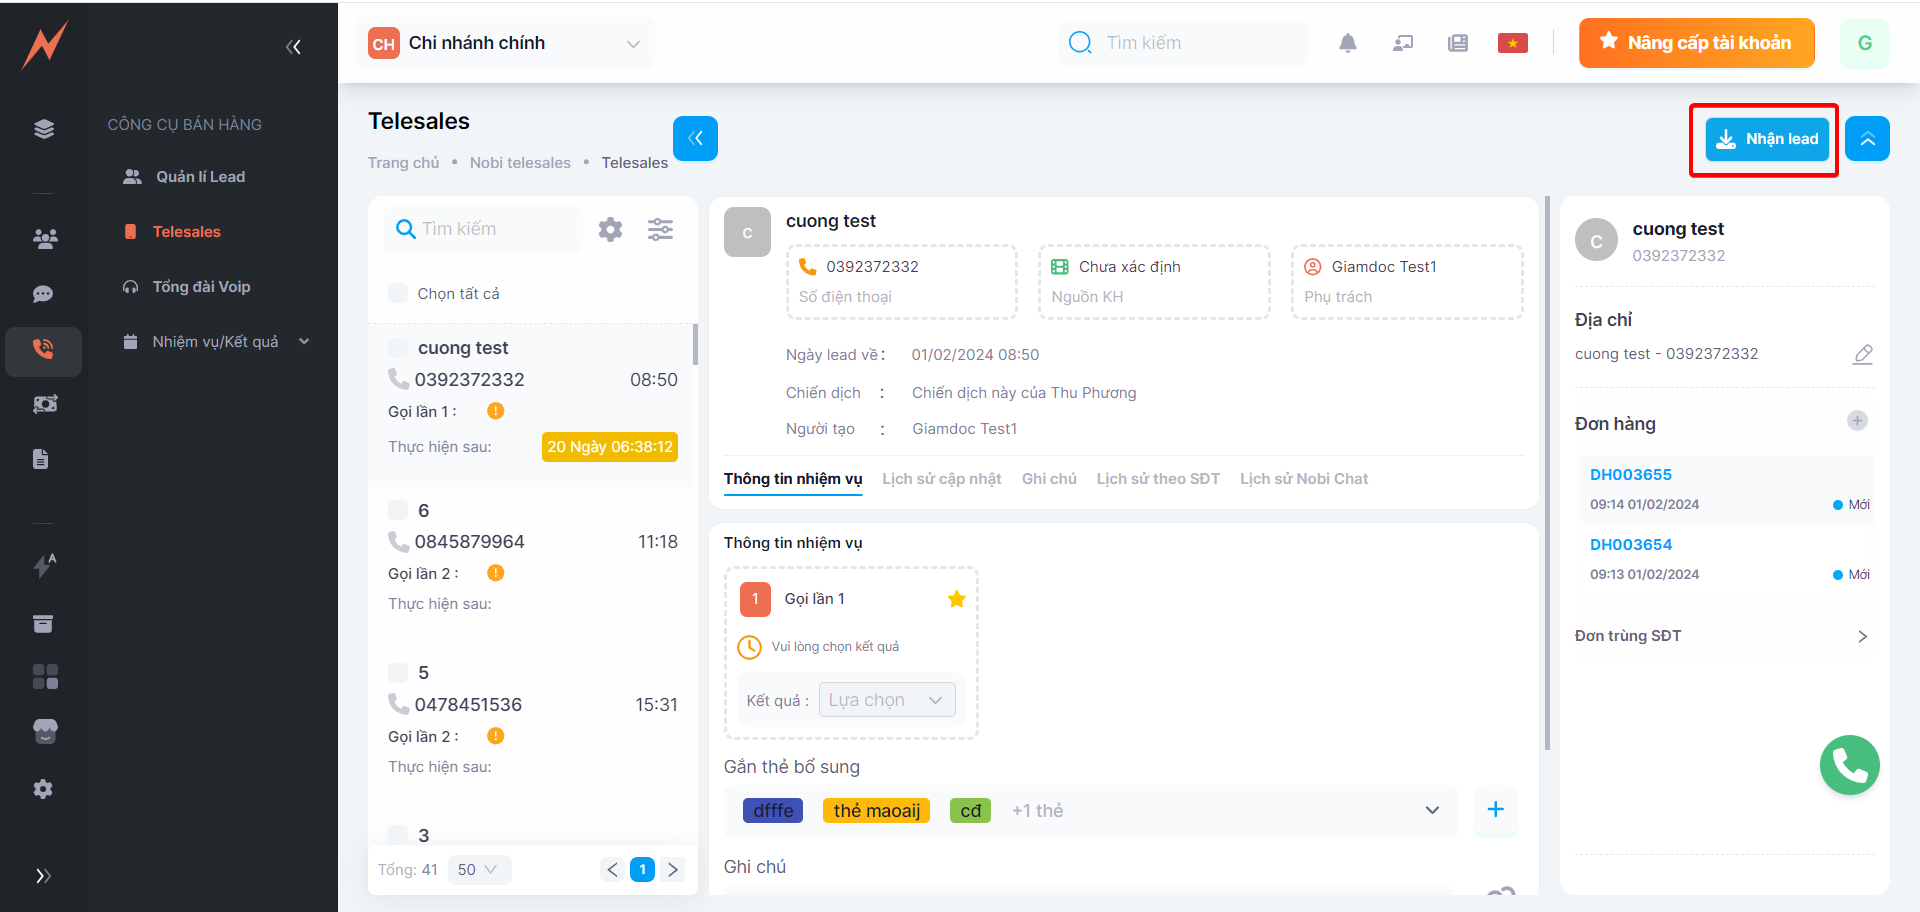
Note: After receiving a lead, if the number of leads you have received meets the configuration settings, the "Receive leads" button will be hidden. If you have not yet received the maximum number of leads, you will continue to be eligible to receive more as they come in, until you reach the limit.
So when will you be able to receive new leads again? If one of the following conditions is met, you will be eligible to receive new leads:
The lead is unsuccessful and is removed from the lead pool.
The lead is successful and is removed from the lead pool.
The lead expires and is reclaimed.
At this point, the cumulative number of leads in your list will equal the number you have set in the configuration.
In the case of automatic lead distribution: Leads will be allocated approximately 1 minute after a user saves the lead distribution configuration. Leads will continue to be distributed until there are no more leads left in lead management.
Leads will automatically be distributed according to the priority settings you have established in the lead distribution configuration..
3. Assign the result to the lead.
Each lead you receive comes with a default task; after performing the task for the lead, you will assign the outcome to the lead corresponding to that task.
Xem hướng dẫn thiết lập Nhiệm vụ/Kết quả
In the event that a lead results in a confirmed order/success, the system will automatically display an "New Order" button for you to immediately process the order for the lead.

In case of incorrectly assigning a result, you can click on the assigned result, select "Agree" to go back to the previous task and reassign the result.

In the event that the lead result has a subsequent task, that task will be displayed and executed after the number of minutes you have configured.: TẠI ĐÂY (Pay attention to step 5 of this section.).

4. Change /skip task execution time.
The next task, although already scheduled, allows for adjustments or bypassing of the execution time.
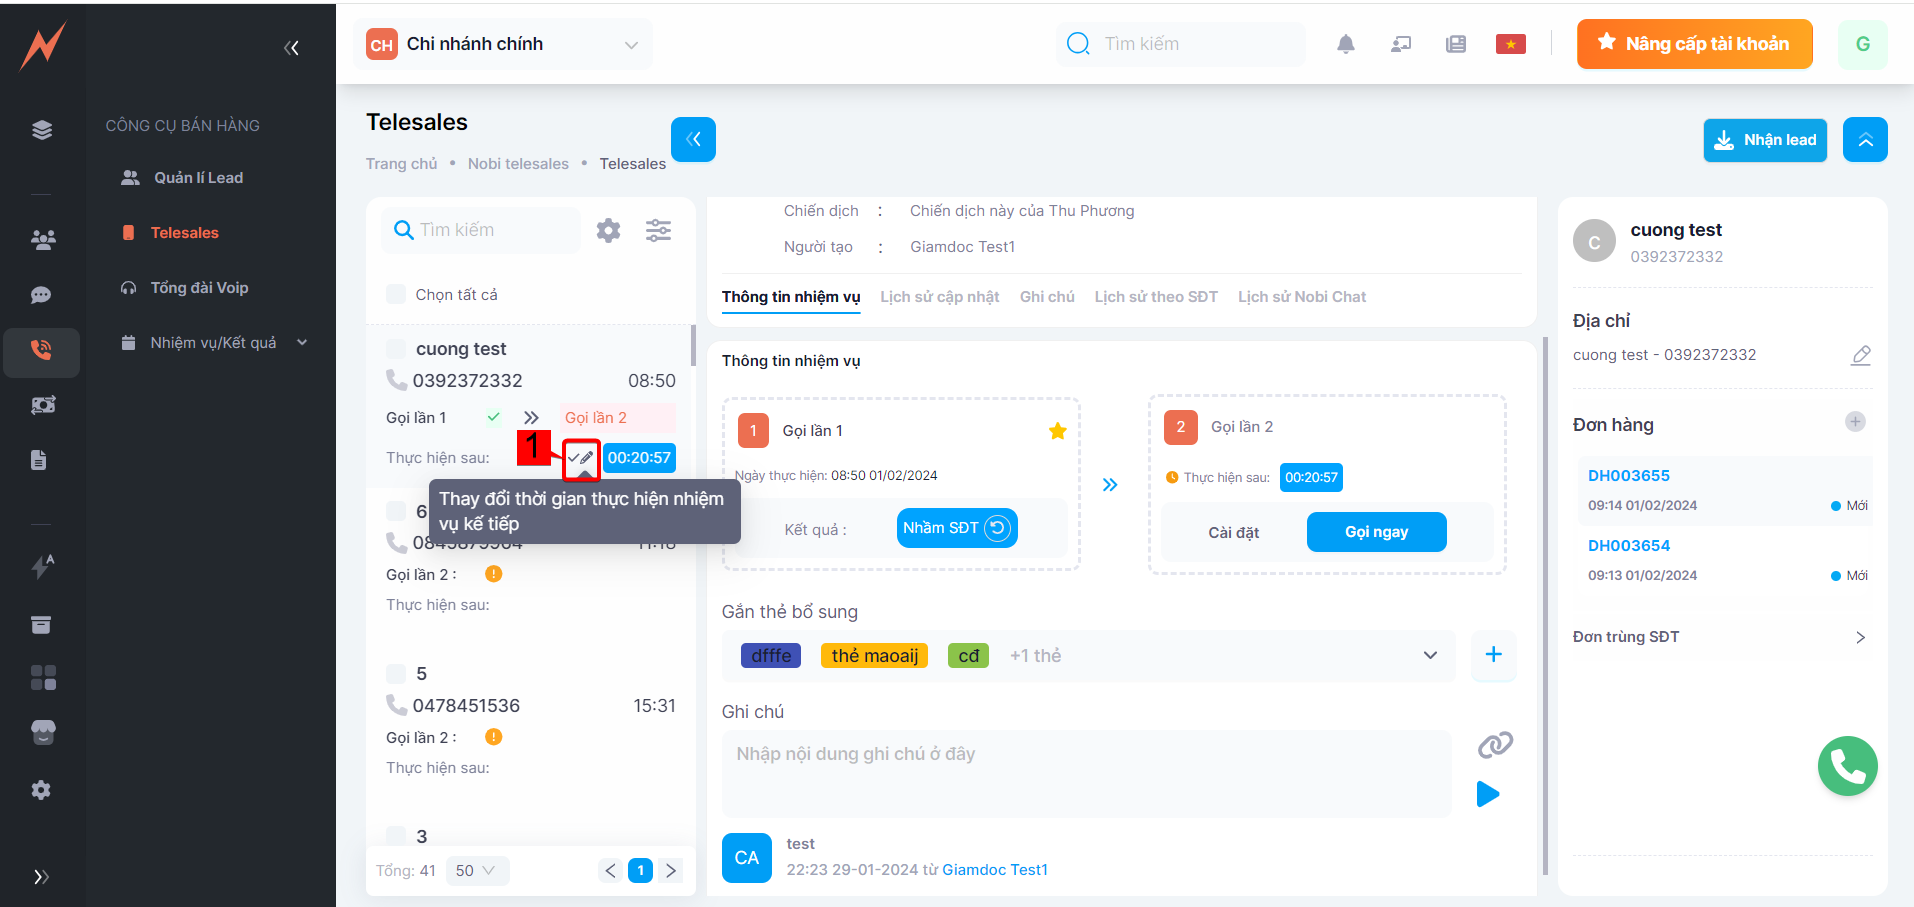
(1) Click the edit button
(2) In the execution time box, you can edit the time or click the (X) icon to delete the time. Then click "Update".
Last updated