NOBIV2 SUPPORT CENTER
  • OVERVIEW
    • Dashboard
    • Performance Tracking
      • Marketing Effectiveness
    • Shipping Report
      • Order Report
        • Overview
        • Statistics Of Returned Orders
      • Inventory Report
      • Import & export report
      • Delivery Report
    • Sale Report
      • Sale Agent Ranking
      • Revenue Report
      • Sales Report
      • Sale's data report
    • Maketing campaign
      • Ads Channel Report
      • Coupon usage
  • CUSTOMER
    • Customer
      • Add customer
      • Manage Customers
      • Customer Detail
      • View Settings
      • Export Customer File
      • Transfer Customer Group
      • Transfer into lead
      • Reassign to other staff
      • Transfer to another branch
      • Share branch
      • View customer purchase history
    • Customer Group
    • Customer Source
    • Coupon
  • NOBI CHAT
    • Conversation
      • Facebook conversation
      • Zalo conversation
      • Shopee conversation
      • Lazada conversation
    • Posts
    • Setting
      • Connect
        • All
        • Facebook
        • Shopee
        • Lazada
        • Zalo OA
      • Nobi Chat setting
        • Facebook
        • Nobi San
        • Zalo OA
  • NOBI SALE
    • Lead Management
      • Import/export lead file
      • Add Lead
      • Lead Devide Configuration
      • Action with Lead
    • Telesales
    • Voip Switchboard
    • Tasks / Results
      • Setting
      • Tasks
      • Results
  • NOBI POS
    • Order
      • Over view
      • Nobi
      • Shopee
      • Lazada
      • Tiktok
    • Handing over to Shipping unit
    • Cross-check
      • Payment Cross-check
      • Return order Cross-check
  • PRODUCTS
    • Product Management
      • Nobi Product
      • E-commerce Product
        • Shopee Product
        • Lazada Product
        • Tiktok Product
      • Product portfolio
    • Supplier Management
      • Supplier
    • Warehouse Management
      • Goods receipt
      • Warehouse transfer note
      • Imported return slip
      • Cancellation slip
      • Refund receipt
      • Ecommerce
      • Missing goods receipt
      • Inventory checking sheet
  • AUTOMATION
    • Automated customer care
  • MARKETING
    • Marketing Campaign
      • Overview
      • Campaign Lists
    • Customer support campaign
      • Overview
      • Customer support campaign
      • Setting
  • App Store
    • All Application
      • Payment History
    • Print Sample
  • CHANNEL CONNECTION
    • Connect Channel
    • Connect to Delivery Firm
    • Seller application
      • Connect to Kiotviet software
      • Connect to Nhanh.vn
    • In-store Sales
    • Landing Link
  • SETTING
    • General Setting
      • Setup company information
      • Setup Company
        • Warehouses
        • License
      • Setting Customer
        • General Setting
        • Coupon Type
        • Customer Group
        • Customer Source
        • Tagging Customer
      • Nobi POS
        • Order Source
        • Add Order Tag
        • In-store Sales
        • Setup Order Displayed
        • Print Order
        • Product and Order Source
        • Inventory
        • Packing and Shipping
        • Discount and Refunds
        • Other Settings
      • Nobi Chat
        • Install Facebook
        • Install Zalo
        • Install Shopee Chat
        • Install Lazada Chat
      • Nobi Marketing
        • Campaign Group
        • Ads Channel
        • Connect Type
        • Form Web đăng kí
        • Key API
      • Nobi Automation
        • Automatic MKT group
      • Data fields
        • The field displays customer
        • The field displays company
        • The field displays contract
        • The field displays product attribute
      • Other Setting
        • Contract category
        • Danh mục báo giá
        • Cash book type
        • Trạng thái công việc
        • Danh mục tài liệu
        • Payment methods
        • Loại chi phí chiến dịch
        • Loại chi phí cơ hội
    • Branches
    • Departments
    • Position and authority
    • Staff
Powered by GitBook
On this page
  • 1. Add Tasks
  • 2. Update Task
  • 3. Delete Task
  1. NOBI SALE
  2. Tasks / Results

Tasks

This feature assists users in setting up tasks for incoming leads on the Nobi Pro system.

PreviousSettingNextResults

Last updated 1 year ago

Running advertisements is one of the activities that business owners frequently implement in their operations. It's not just about running isolated ad campaigns; sometimes, business owners need to run multiple campaigns simultaneously across various channels. So, with the influx of leads coming from different ad URLs, how can one manage them easily? How can we determine if a lead in the list has already been processed by a staff member or not?

In this section, we will introduce you to the feature of setting up tasks for leads. Let's explore it now.

Let's explore the task assignment feature for leads in the Nobi Pro system.

At the Nobi Pro admin page, go to Nobi Sales -> Task/Results -> Tasks tab.
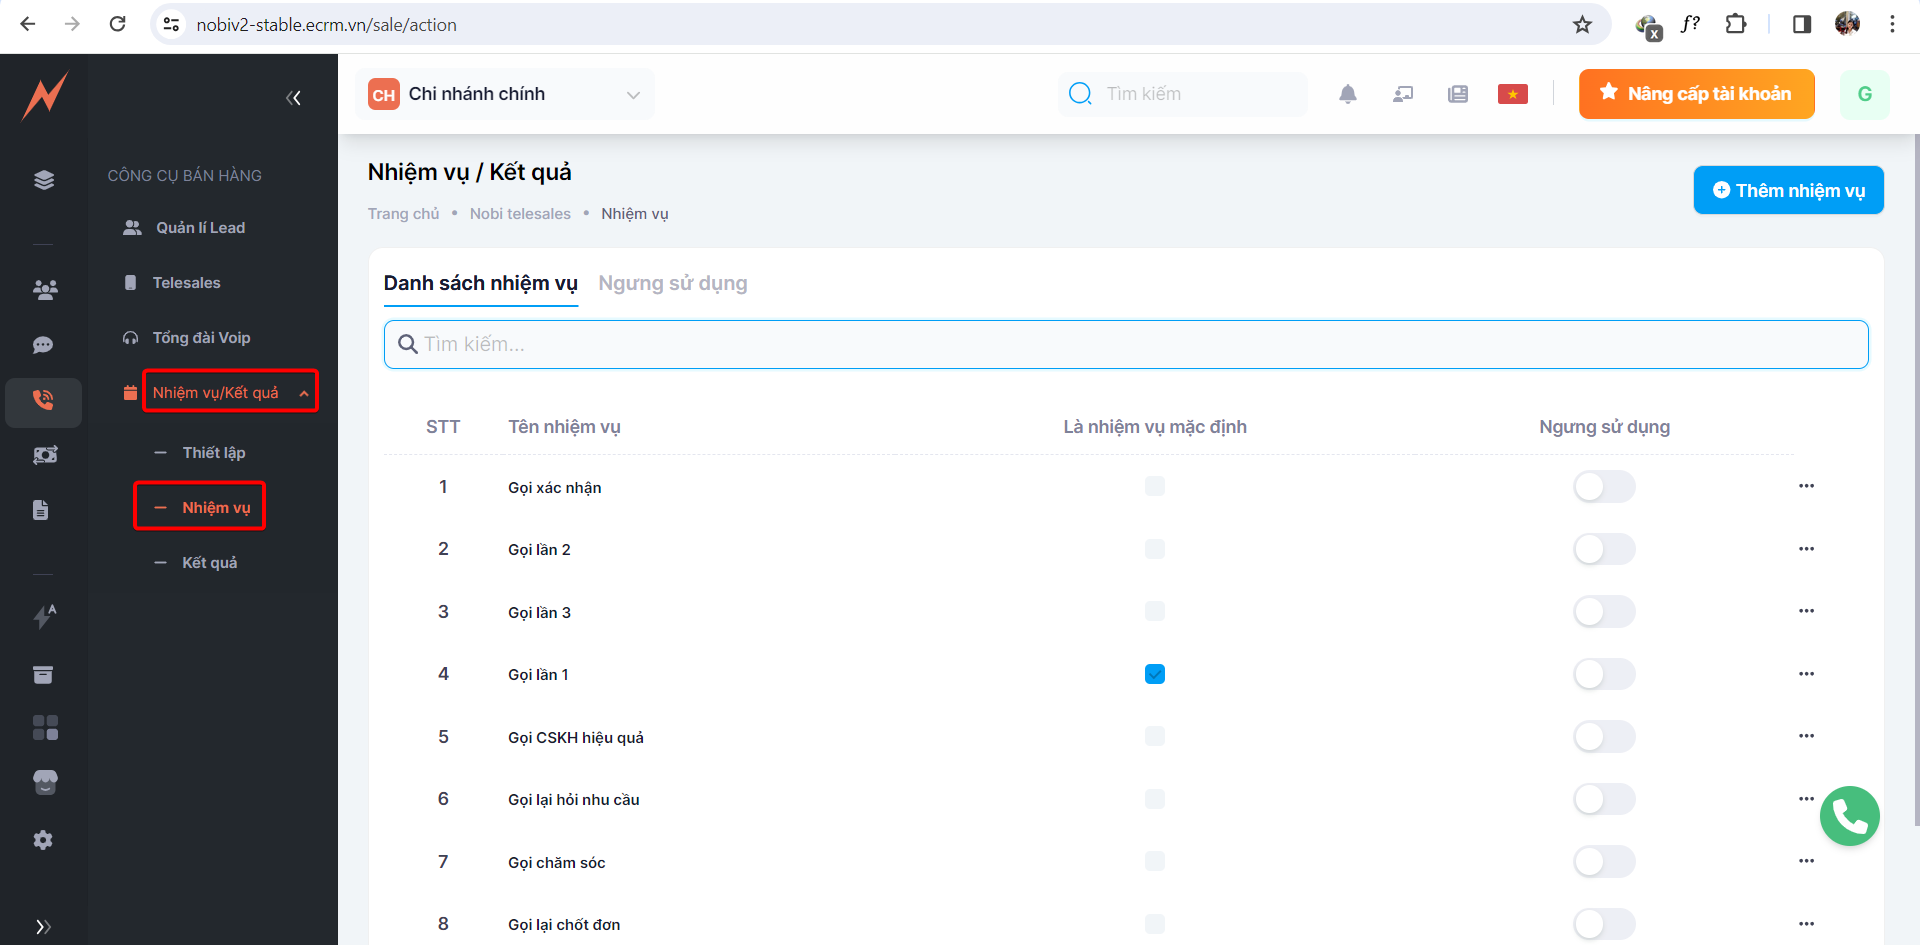
1. Add Tasks

Với mỗi lead đổ về, tùy thuộc vào mục đích của bạn mà tạo nhiệm vụ cho lead đó.

For example: If you run an ad campaign for selling t-shirts, when leads come into the system, you can create tasks such as:

  1. Make the first consultation call

  2. Make the second consultation call (in case the first call is not answered, the line is busy, or the phone is turned off)

  3. Make a confirmation call

  4. Make a customer care call

At the task management interface, please follow these steps to add a new task:

Step 1: Click "Add Tasks" -> Add New Tasks Form Displayed

Step 2: Enter Task's Name

Step 3: Turn ON default action when receiving a lead (If desired)

Step 4: Click "Add Task"

Next, move to the RESULTS tab to configure the outcomes for the tasks above.

To manage the tasks you have set up, please refer to the following guidelines provided by us.
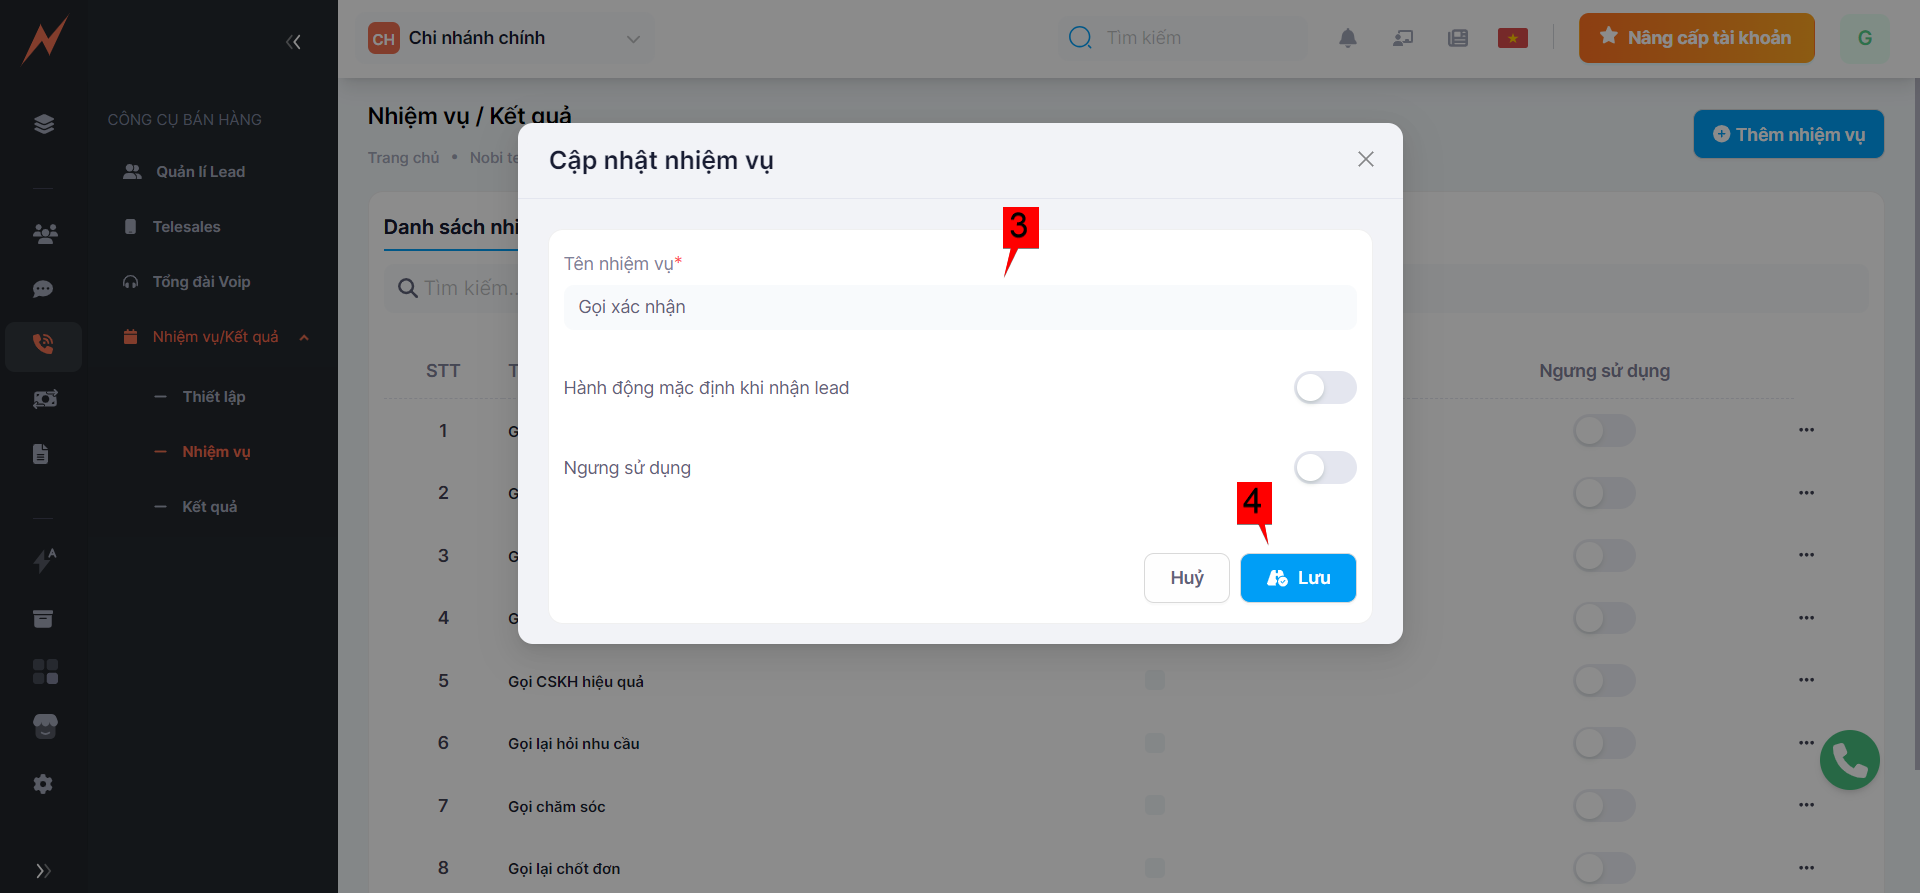
2. Update Task

At the task list interface, to update a task, please follow these steps:

Step 1: Click on the three-dot icon to the right of the task.

Step 2: Click ''Edit'' -> Update Task Form Dísplayed

Step 3: Enter Information

Step 4: Click "Save"

3. Delete Task

At the task list interface, to delete a task, please follow these steps:

Step 1: Click on the three dot to the right of the task

Step 2: Click "Delete"

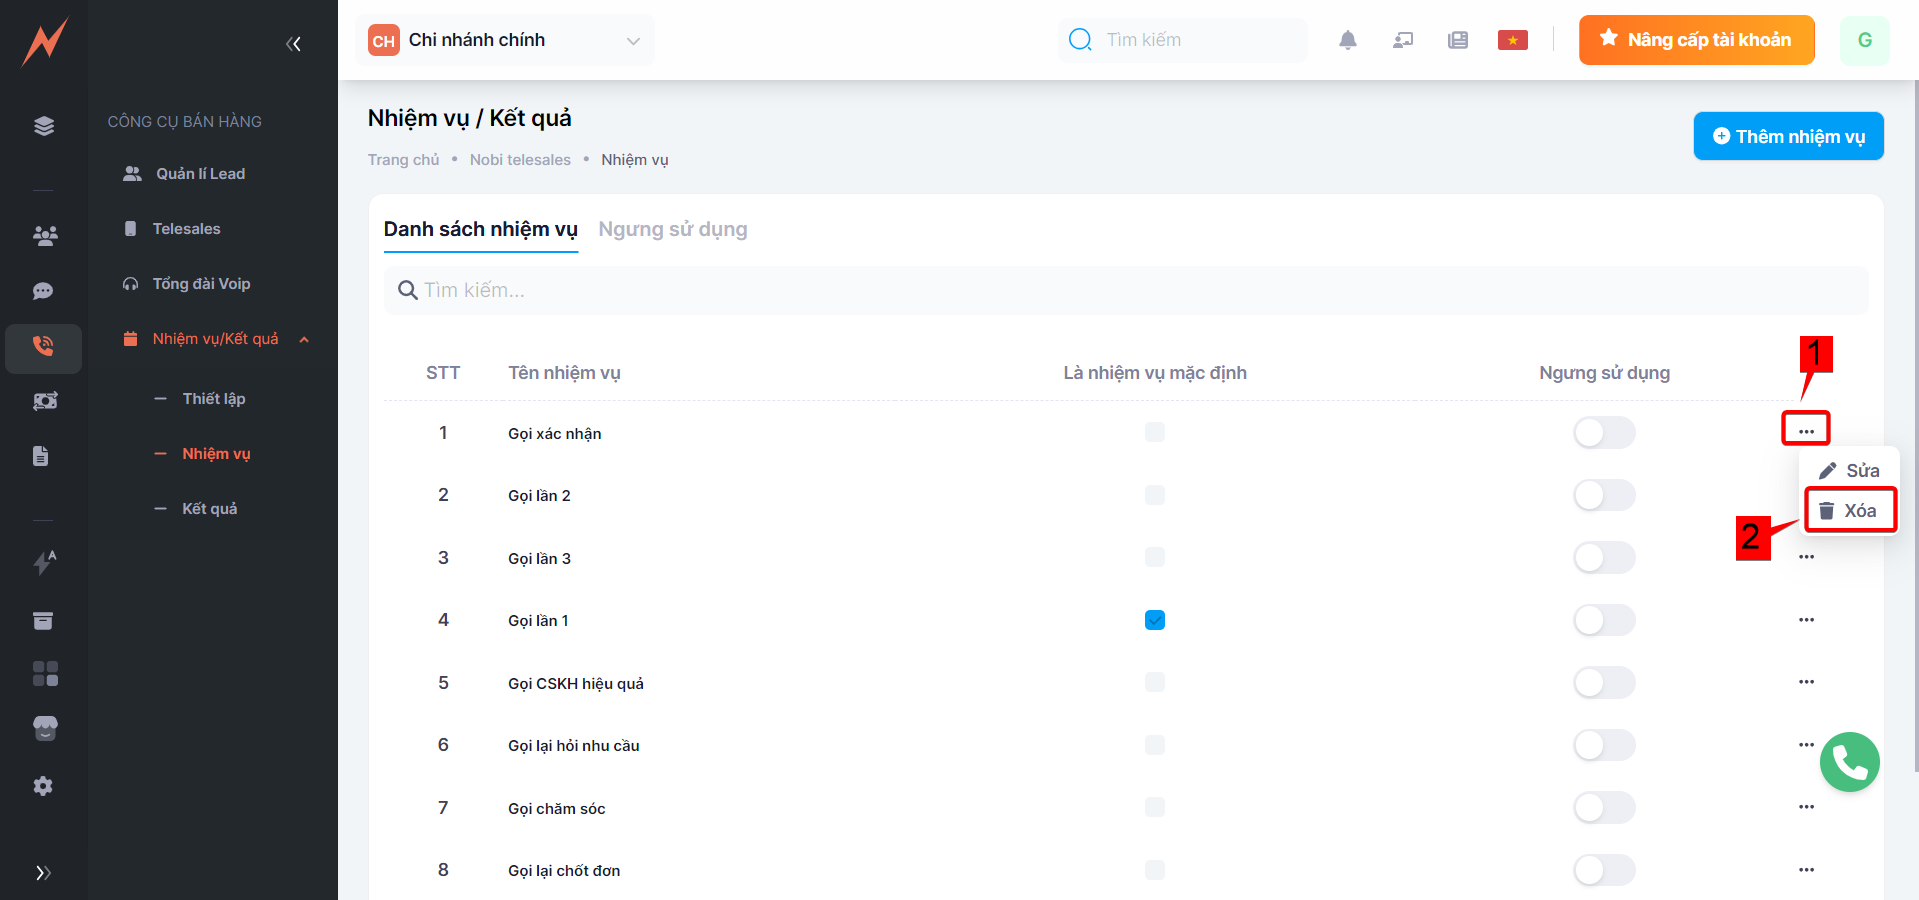
Note: For tasks with established outcomes, you must not delete the task.