
Branches
Nobi Pro supports retail business owners with features for setting up and managing data across multiple branches of a system. User accounts are assigned permissions for specific branches, ensuring they only have visibility within their designated branch.
For many retail business owners, a system will often encompass multiple branches. To assist these entrepreneurs in easily managing customers, orders, inventory, reports, or data from each branch, Nobi Pro offers a feature to set up and manage branches.
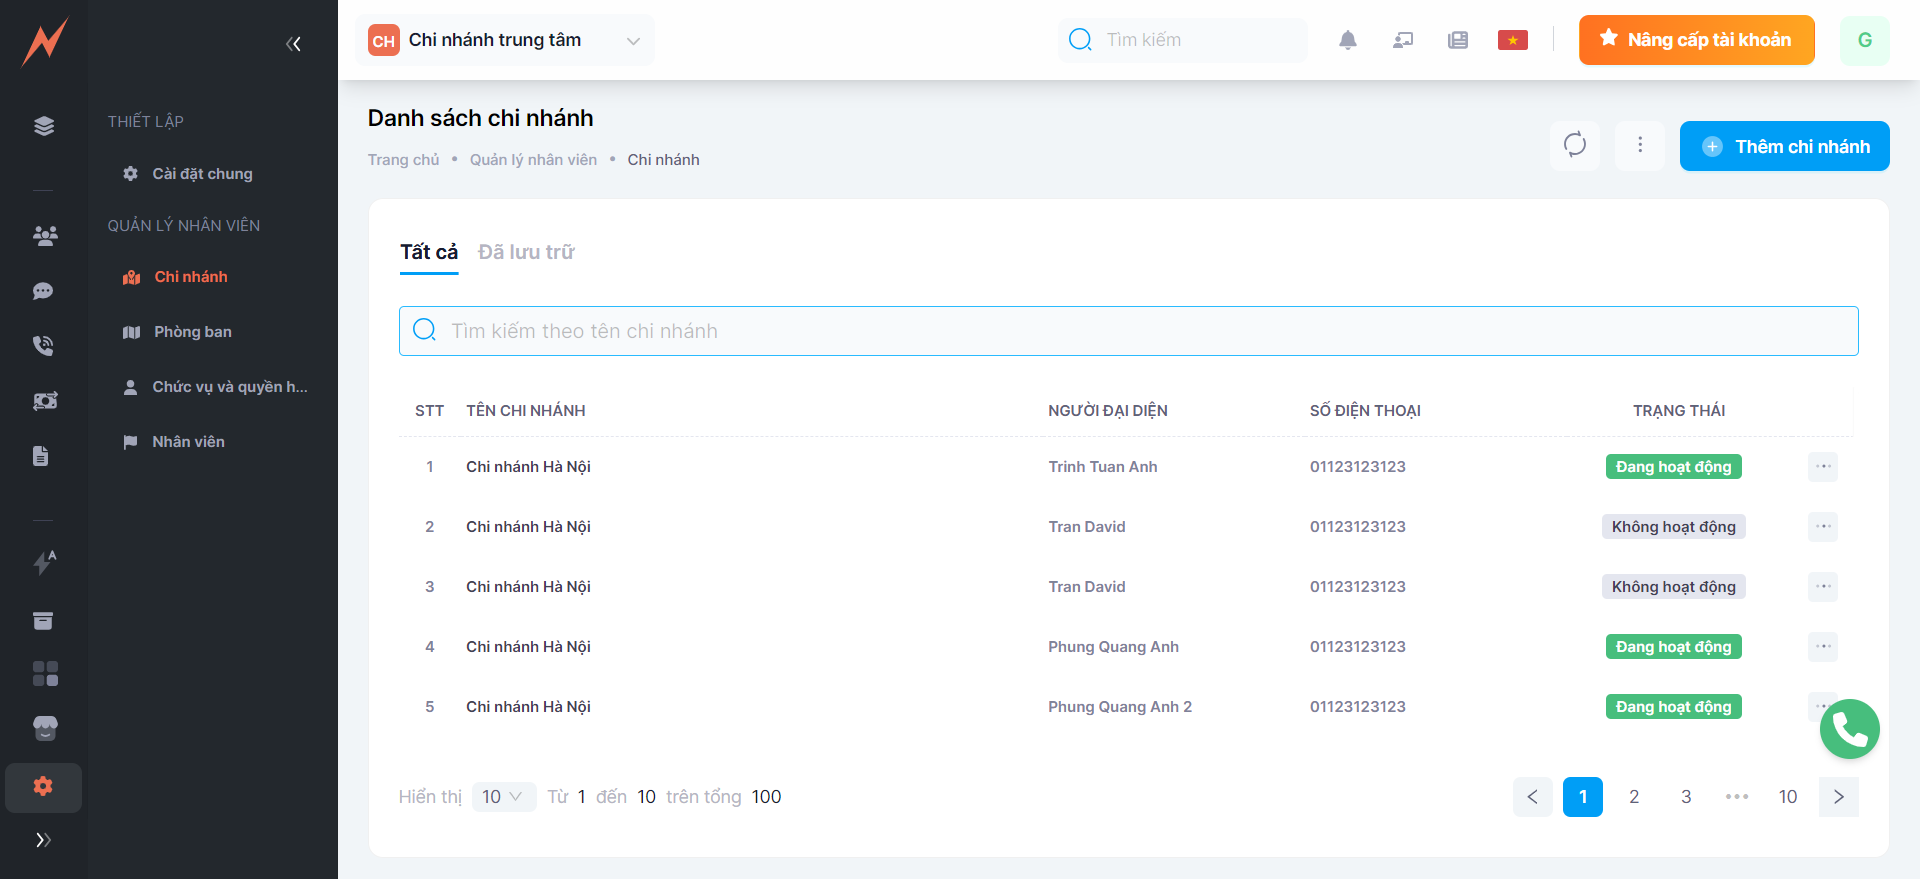
To explore this feature, in the Nobi Pro admin page, go to Settings -> Branches. The interface will be displayed as shown in the image below.
1. Add new branch
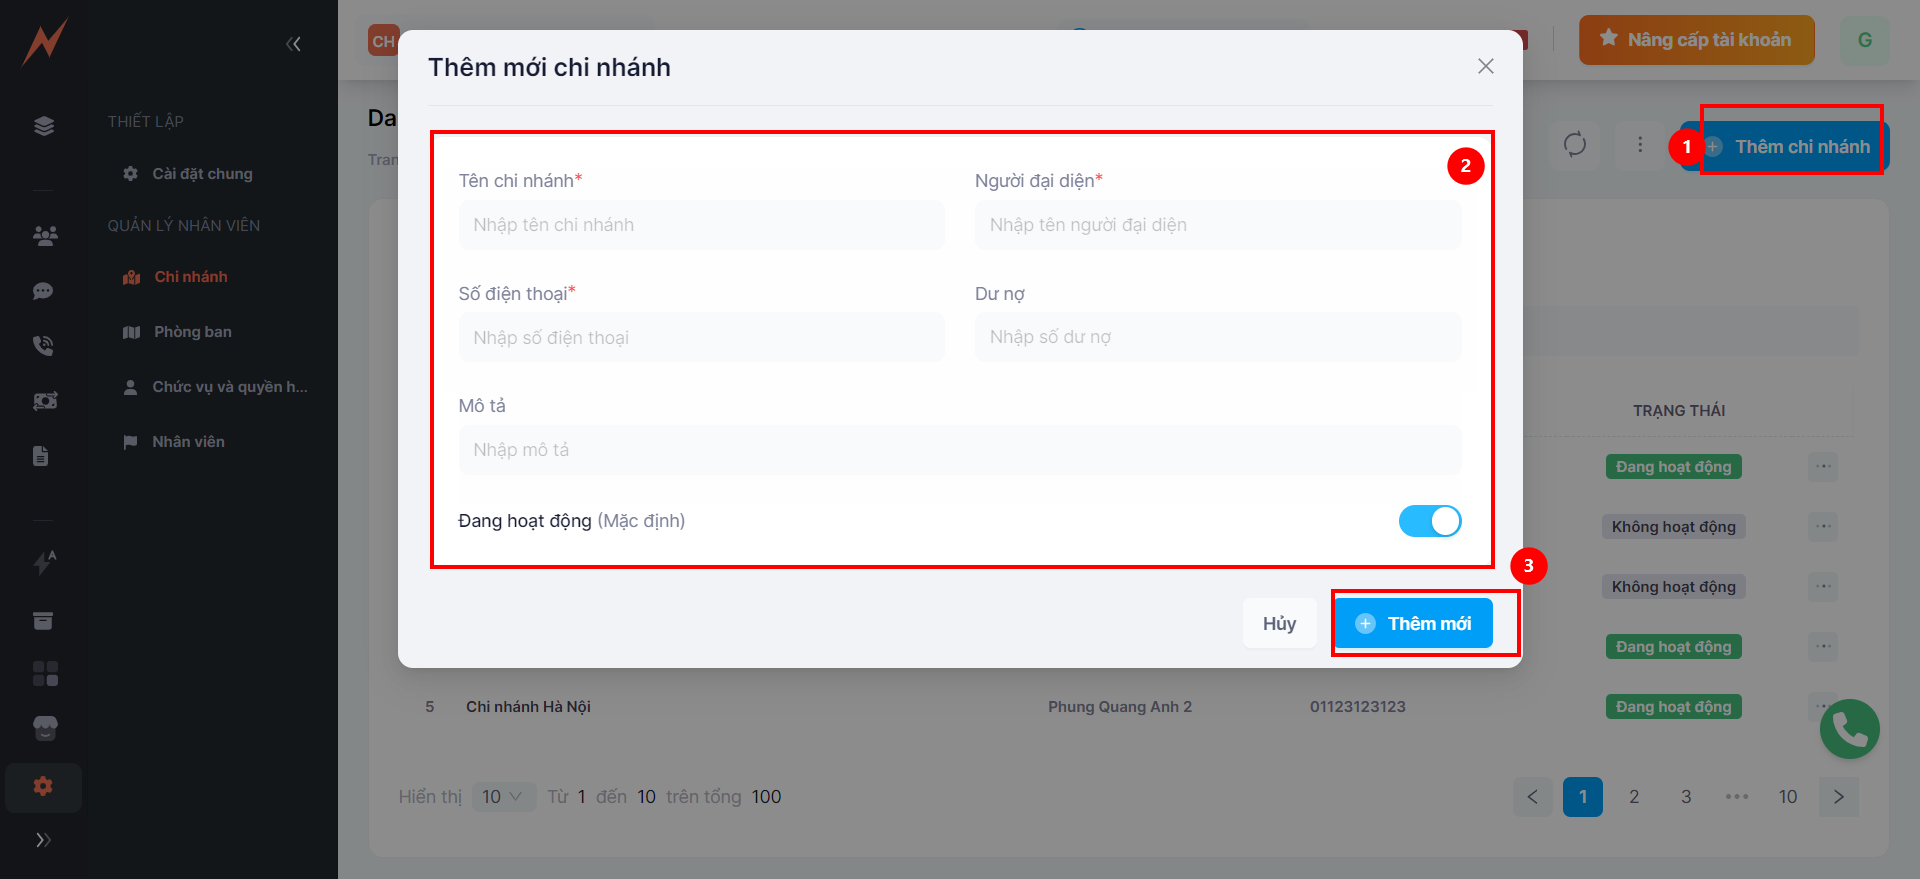
At the branch management interface, to add a new branch, please follow these steps:
Step 1: Click on "Add Branch" -> The branch addition form is displayed
Step 2: Enter information into the form, including:
Branch Name (required)
Representative (required)
Phone Number (required)
Branch Description
Outstanding Balance
*** Note: The information of the representative person, branch phone number is the information sent to the shipping company and is the contact phone number of the shipping company for picking up and returning goods.
Step 3: Click "Add"
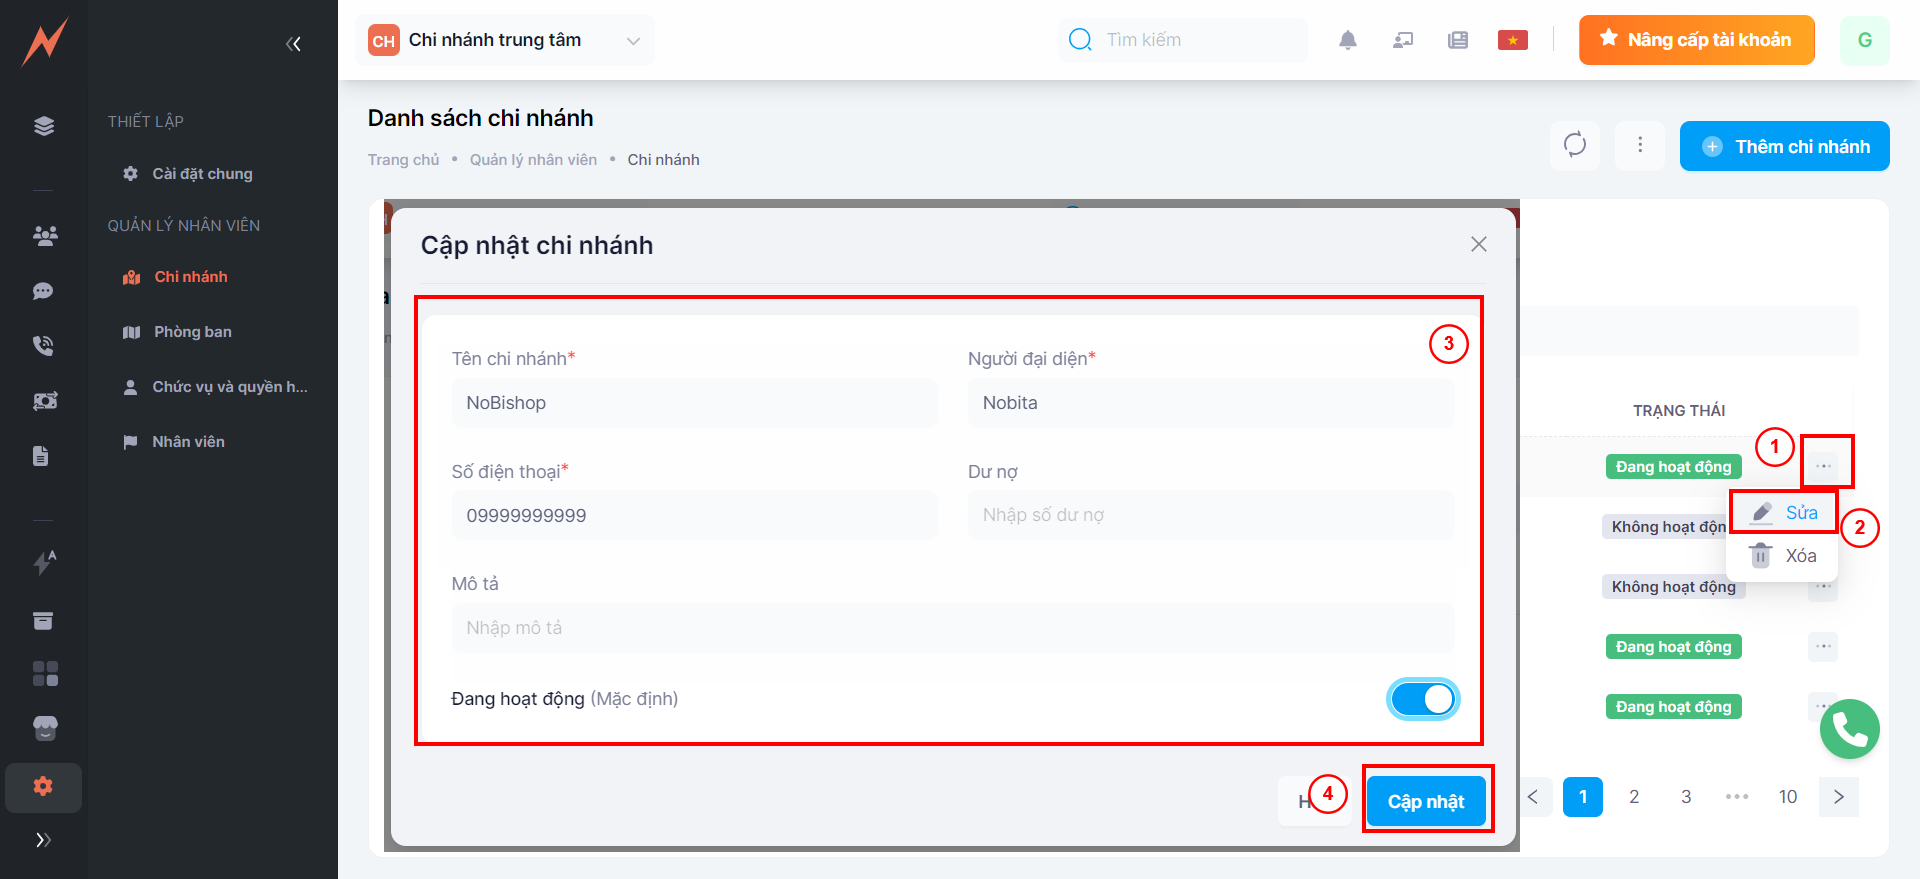
2. Update branch
At the branch management interface, the list of branches is now displayed. To update a branch, please follow these steps:
Step 1: Click the three dots on the right side of the branch
Step 2: Click "Edit" -> Update form display
Step 3: Enter the information to be updated
Step 4: Click "Update"
3. Delete branch
At the branch management interface, the list of branches is now displayed. To delete a branch, please follow these steps:
Step 1: Click the three dots on the right side of the branch
Step 2: Click "Delete"
Step 3: Click "Yes "

Last updated