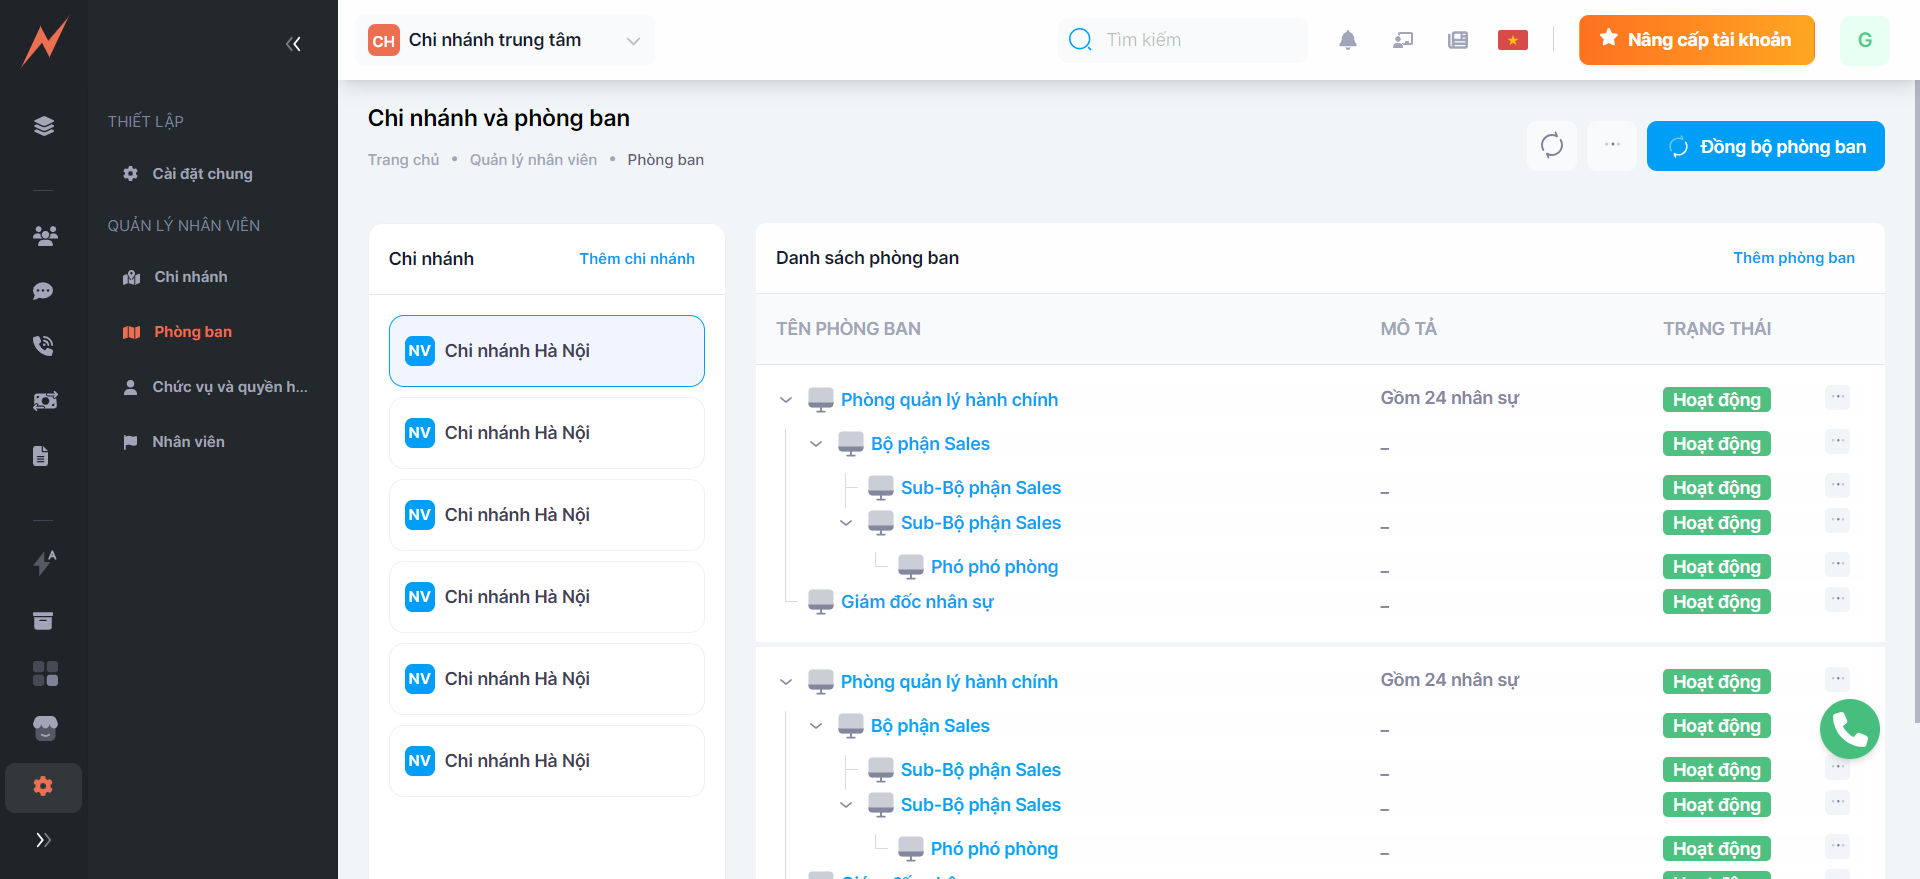
# Departments
To set up and manage departments, on the Nobi Pro admin page, go to **Settings** -> **Departments**. The interface will be displayed as shown below.
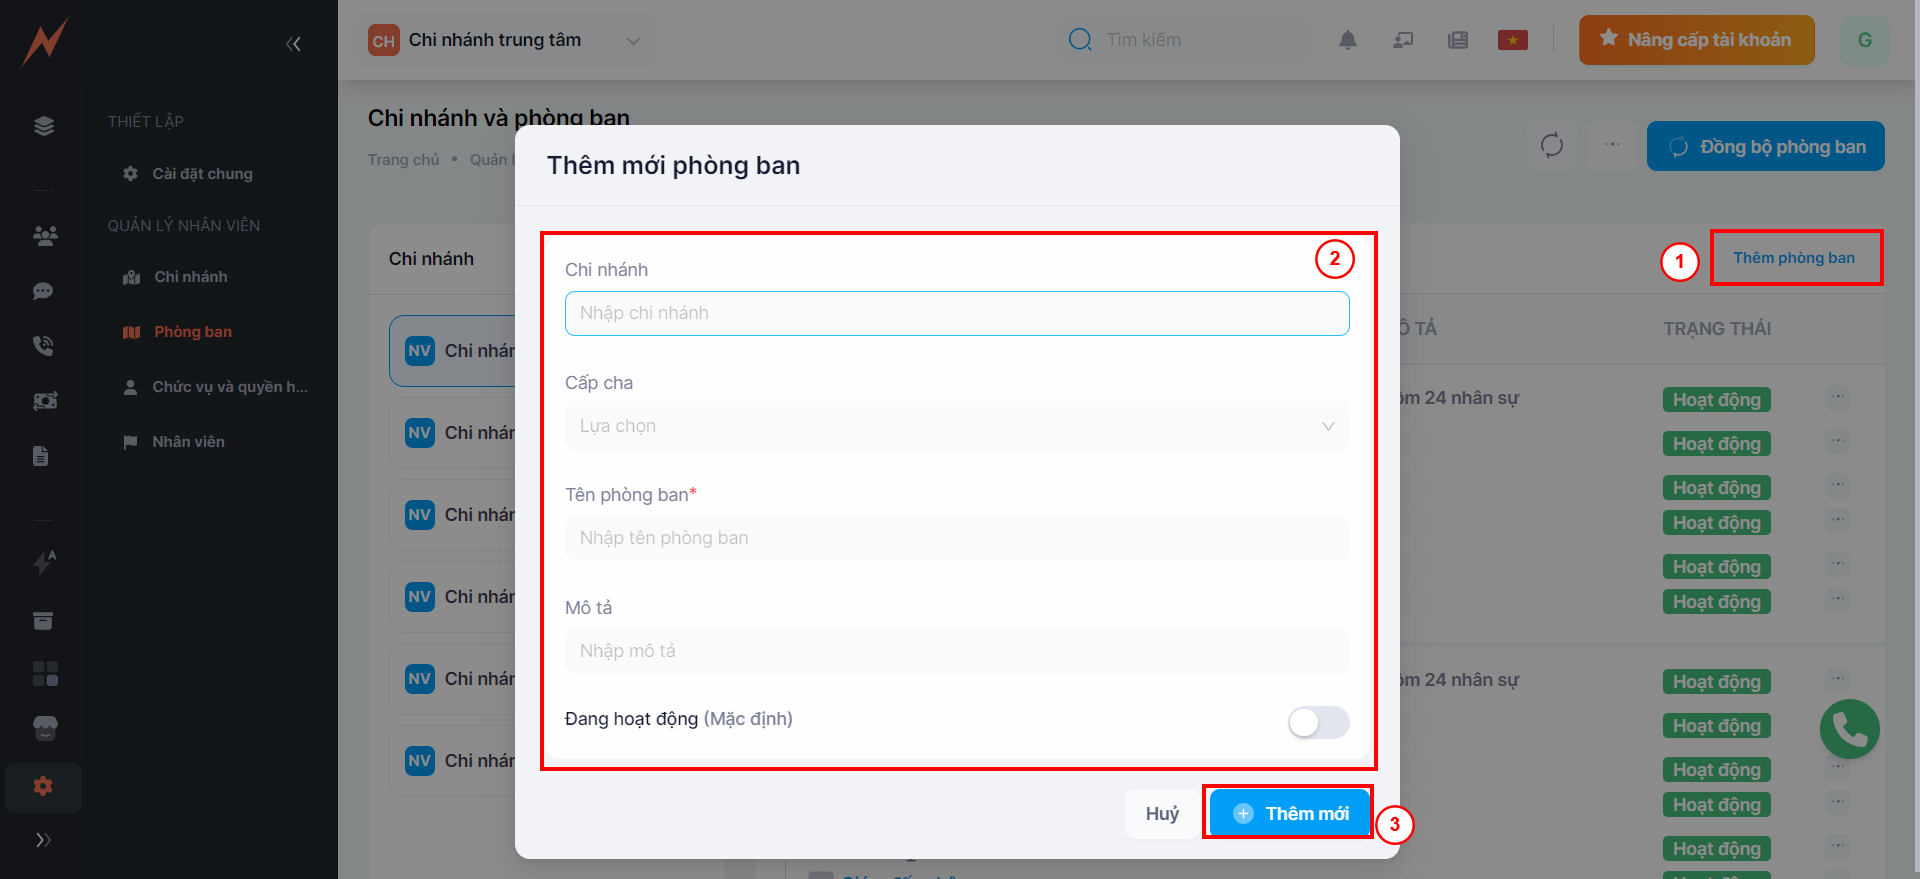
## 1. Add new department
In the department management interface, to add a new department, please follow these steps:
Step 1: Click "Add department" -> New department addition form displayed
Step 2: Enter information into the form, including:
* Select branch (Branch setup guide: [**HERE**](https://helpv2.nobi.pro/setting/branches))
* Enter the department name
* Enter department description (if any)
Step 3: Click "Add"
## 2. Update department
To update a department, first you need to select the branch that contains the department you wish to update.
Step 1: Click on the three dots to the right of the department.
Step 2: Click "Edit" -> Update form display
Step 3: Enter the information to be updated
Step 4: Click "Update"
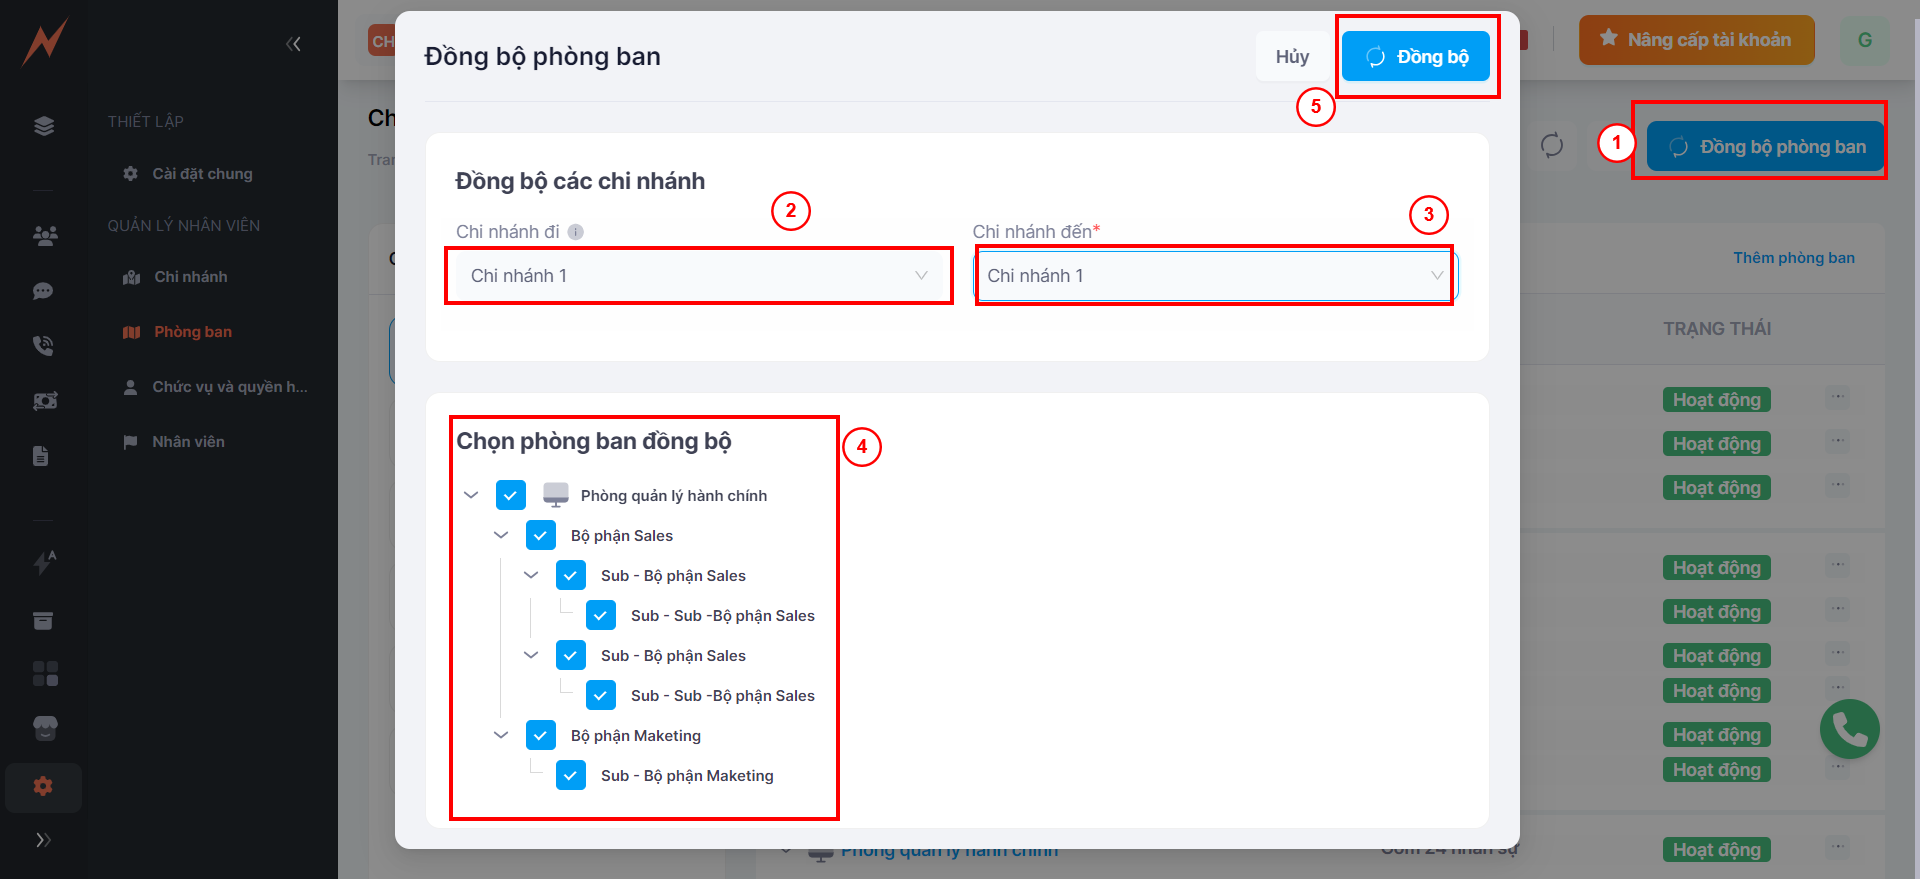
## 3. Department synchronization
Currently, when a system with multiple branches is initialized, and all branches have the same departmental roles and permissions, the manager using the system has to repeatedly create departments, roles, and assign permissions for those roles across multiple branches, which is time-consuming and labor-intensive.
Understanding the issues that customers are facing, Nobi Pro has launched an additional feature for department synchronization that allows users to easily sync departments from one branch to another, preventing the need for users to recreate departments, positions, and assign roles at different branches.
To synchronize the departments, the following steps need to be taken:
Step 1: Click "Synchronize department"
Step 2: Select the branch to go to (default is the branch currently being operated on)
Step 3: Select Destination Branch
Step 4: Select the department you want to synchronize.
Step 5: Click "Sync"
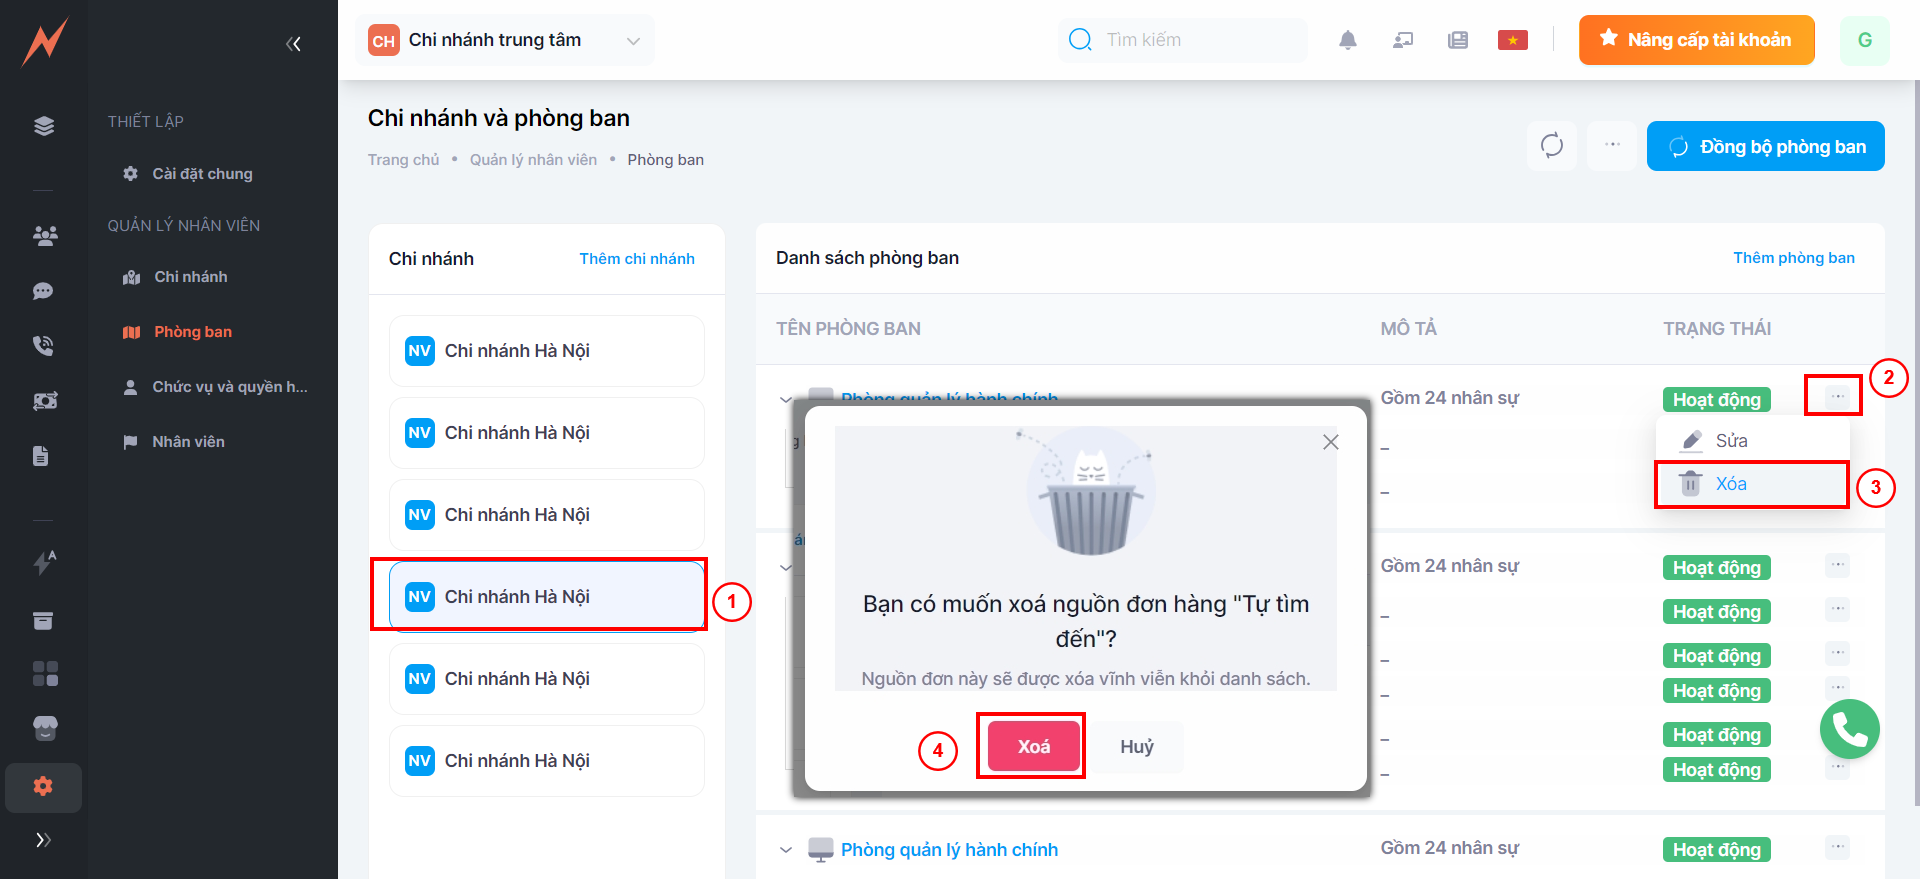
## 4. Delete department
To delete a department, please follow these steps:
Step 1: Select a branch
Step 2: Click on the three dots to the right of the department
Step 3: Click "Delete"
Step 4: Click "Yes"